Glittering Starburst Card (for Creative Expressions)

Glittering Starburst Card


I’ve been sent some new goodies for April DT posts for Creative Expressions 🙂

First up from my goodie package are the brilliant Sparkle Texture Pastes from Cosmic Shimmer. These are slightly thicker than their clear texture paste, so keep to shape a little better. The coarse glitter doesn’t interfere with smoothing on too much, so this stencilled card was quick to make (aside from drying time). I did the stencilling in two goes, one for each colour, but more precise appliers may be able to do it in one go.

Just before the shopping list, don’t forget the BSSBS on 12th-13th April at Ally Pally, early; bird discount of £1 off for tickets booked before 8th April. See you there! Click for details:BSSBS LOGO Original

Continue reading

Watercolour Card using Reinkers (for Creative Expressions)

Watercolour cardThis is the last of my posts using this month’s featured stamps. I’m back to the Creative Expressions Singles ‘Scentiments’ and taken the image from the thank you stamp to paint with Distress Reinkers. Quite a quick make in a clean and simple style.

Just before the shopping list, don’t forget the BSSBS on 12th-13th April at Ally Pally, early; bird discount of £1 off for tickets booked before 8th April. See you there! Click for details:

BSSBS LOGO Original

Continue reading

‘Scented’ Quadrant Card – for Creative Expressions

Scented Quadrant Card

Oh I’m so not at my creative best at the moment with a head full of snot cold threatening to drip on my creations (too much info?)… And this card isn’t highly perfumed because of my lack of a sense of smell at the moment! Despite feeling rotten, I managed to continue using the perfume-themed stamps sent to me this month by Creative Expressions – this card features silver embossed ‘Scented Corner’ and ‘Scented Border’, coloured with Cosmic Shimmer Iridescent Watercolour paints and embellished with coloured PVA.

Just before the shopping list, don’t forget the BSSBS on 12th-13th April at Ally Pally, early; bird discount of £1 off for tickets booked before 8th April. See you there! Click for details:

BSSBS LOGO Original

Continue reading

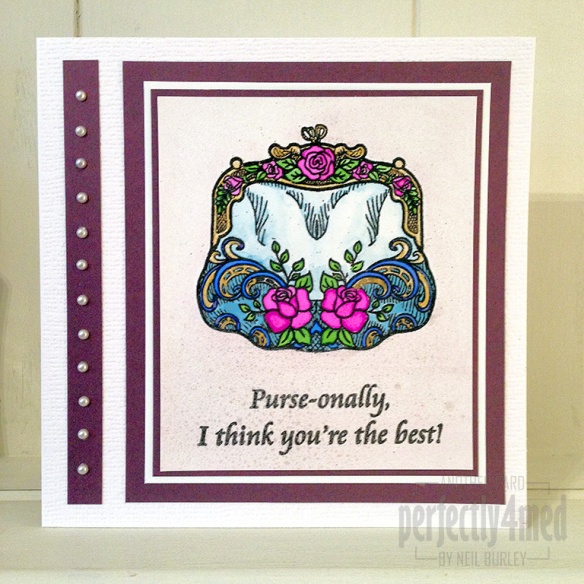
Rose Blossom Purse Card (for Creative Expressions)

Rose Blossom Purse CardWelcome to another year on my blog, and we kick off with a card featuring the latest Creative Expressions Singles stamp – Rose Blossom Purse. The Singles range are rubber stamps pre-mounted on cling foam and cut out ready for slapping onto acrylic plates for stamping. I’ve done a simple card, concentrating on using lots of different colouring techniques for my tutorial…

Continue reading

The WOW! Guide to Perfect Embossing

For those of you that aren’t familiar, or are a bit rusty at, or may be just want to have some good tips and tricks to improve, I’ve written a photo guide to heat embossing for beginners, complete with troubleshooting tips. It’s over at the WOW! Embossing Powders blog if you want to know more.

WOW! Some new stamps :)

Very exciting news – WOW! Embossing Powders have new stamp designs available. Here’s a quick card showing some of them, with a minimalist design suitable for beginners.

I’m entering it into the ‘Less is More’ one layer challenge this week as well. I’ve prepared an instruction sheet ready for the Hobbycrafts show at the NEC, Birmingham (22nd-25th March) – here – I’d love you to have a look and let me know if it’s clear enough!


An old magazine and a bit of Brasso?

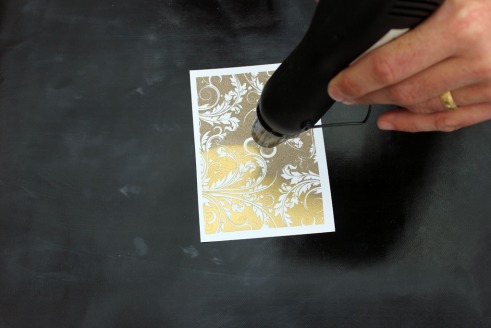
Recycling is all the rage these days – apparently making something you’re about to throw away into something useful and beautiful is now known as upcycling. Here’s how to upcycle a glossy magazine page into a pretty greetings card using Brasso, embossing powder and a bit of elbow grease.

Continue reading

Self-closing box instructions

Following several requests (well, at least one!), here are instructions for making my self-closing box using the printable template on my Template page.

Either print or trace the outlines from the template onto a sheet of A4 card (at least 160gsm recommended)
Cut round the solid lines
Using a scoring blade in your personal cutter, or an embossing tool or other scoring technique of your choice, score the dotted lines
Crease all the scored lines, folding upwards. Add a strip of double sided tape to the underside of the tab (red strip in photo)
Stick down the tab to the inside (printed) side of the last (right hand) section of the box, to make a pentagonal cylinder
The tags tuck under one another to close the box – you should end up with a nice swirl. To unlock, just pull one of the hooks from the rest. By doing the same top and bottom, you can create a horizontal box like the centre of a Christmas Cracker
If you want a vertical standing box, try tucking the hooks toward the inside of the box – this is tricky and fiddly, but gives this smooth bottom closure
And this is what it would look like on the inside.
Hope this helps! If you want a video version of this, then I’ll point you toward my Amazon wish list so you can get me the webcam I’d like to set up video tutorials 🙂