Distress palette distress!

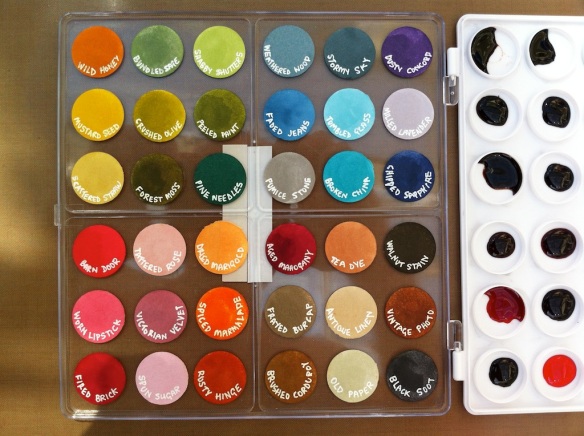
Well, I thought I had it covered… I took my distress ink palette with me on holiday, intending to do some distress water colouring while I was away. I popped it in a bag with a piece of kitchen towel, sealed it up, placed in flat in a box, flat in the car boot and off we went. It seems that somewhere along the 4 hour drive to Holyhead, the ferry crossing to Ireland and 1.5 hours driving in Ireland there was sufficient rock and roll to slosh things about a bit:

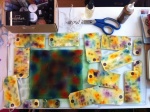
Needless to say, I didn’t get any water colour done with this palette – I had to use my distress markers instead. I decided not to waste the lovely colours and used an adaptation of my paper towel printing technique to produce lots of lovely coloured napkins for backgrounds and decoupage:

I have several plies of the oranges, the blues and the greens ready for my collages and bits and bobs. After I’d rescued and used what I could, I set to washing up the mess and replacing the colour swatches on the lid. As you’d expect, all the inks rinsed off the plastic leaving no residues, unlike the stickers which left their adhesive behind – no matter, it just helps the next ones stick more! A couple of hours later, and my palette is restored:

A happy accident? Time will tell as I use up the various bits of kitchen paper I used to blot up the  mess in my artwork – watch this space! I would also like to find a thin sheet of silicone/rubber to seal the palette for the next trip – or thin one inch rubber washers to stick onto the lid. The palette is great, both in construction and price – but it sooo isn’t water tight! I’ve also learnt to only use half a dropper full of ink in each well rather than the full one I did first time round!


Paper Towel Printing – Distress Inks

I’ve carried on playing with my newly discovered technique, and thought I ought to try Paper Towel Printing with distress inks. Here’s a step by step guide:

Firstly, place your sheet of paper towel onto a glass mat or other non-absorbent surface. Wet by spritzing with water.

-=-

 Then I spritzed with homemade glimmer mist spray – good to have a background colour. I think it also helps the other colours keep in their place… This one is Peeled Paint with gold perfect pearls.

[To make your own mist – take one dropper full of reinker and add it to a mini-mister. Add a small scoop of perfect pearls. Fill with water to three quarters full, replace cap and shake vigorously. Spritz.]

-=-

Drop on ink from your choice of distress ink reinker – this is Faded Jeans.

-=-

Spritz each of those dots with water until they start bleeding.

-=-

Repeat with more colours – this is Spiced Marmalade.I also added Dusty Concord.

Spritz with water.

-=-

Start printing! Lay a tag/paper/cardstock/ATC on the towel and smooth down with your fingers. You may see water squeeze out of the edges at first – that’s what you’re after 🙂 You’ll also find the colours start to spread a little more into one another.

-=-

All of this from one sheet? Yup – and they are all double-sided as well. It seems that the colours stay pretty much where you put them, so this would be great to carry a colour theme throughout a tag book, or art journal, or across several pieces of cardstock for scrapbooking or card making.

-=-

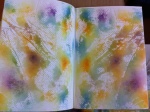
And there was still some left over to do my art journal 🙂

-=-

Close up of the tags – they’re a bit blotchy still as I didn’t wait to dry them before sharing this blog entry with you! Lots of texture on some, lovely watercolour effects. Love it!

Paper Towel Printing – for art journals and backgrounds

I’ve been playing today 🙂  And one of the things I got playing with was a paper towel. I originally planned to dye it with acrylic paints/inks for decoupaging into my art journal. But one thing led to another, and before long, I’d ended up with what I think to be a totally novel technique – at least I haven’t seen it in all my hours browsing art journal techniques online. I’ll be calling it Paper Towel Printing, and this is the result:

Continue reading