Our theme across all our activities this term at college is ‘influenced by an artist’. I’ve chosen the Polish surrealist Jacek Yerka to base my work on, and for print I was asked to do a drypoint. I discovered this is an etching process where the ink is trapped in the grooves and burrs made by scratching onto metal or acrylic and then transferred onto the substrate using pressure. I scratched my drawing onto a sheet of clear acrylic sheet (approx. A5 size), applied etching ink (which is very viscous), removed most of it, and then printed onto previously wetted watercolour paper using an etching press. Any ink left on the acrylic gets transferred to the paper, so removing it from where you don’t want it is quite laborious! I was sooooo excited as the first print was revealed, and that didn’t really diminish as I did a limited print run. I’m going to have a go replicating it at home using one of the many die cutting machines in place of the etching press, and more common crafting inks. Here is the basic print, and I’ll be colour washing some in due course:
Category Archives: College Course
Two Point Perspective
I’ve spent all afternoon on my still life homework for the holidays… an exercise in two point perspective. An hour of reading, a couple of outline sketches and some more research led to a couple of hours doing all the construction with vanishing points at the zenith and nadir rather than on the horizon line – but I kinda like the effect. It then took another hour or so to enlarge, trace and shade the image, and here it is. Those that know, feel free to critique!
Photography – Term 2 – Final Image
Another part of my Extended Diploma in Art & Design course is a photography block. This term’s work followed the theme of ‘manmade’ and the challenge was to incorporate some of the items we’d drawn over the Christmas break into a digital studio photoshoot, followed by image manipulation in Photoshop. I chose to use a manual coffee grinder as that had been the most interesting shape to draw, and my imagination took me off on a flight of fancy – so I emptied the cutlery drawer and with a bit of jiggery-pokery, I came up with this:
If you would like your own photographic quality print of this image (without the copyright notice) then please contact me using the email button in the sidebar.
Life Drawing – more from Term 2
That’s another block of life drawing finished! This term we’ve looked at the paintings and sculptures of Antony Gormley and used wax and ink to paint the human form. This is the second piece from Week 2 – I’ve already posted my work from Week 3 here. I’m particularly pleased with the crouching figure. Many thanks to our model for his fortitude!
This second image is the result of a four 40 minute sittings over two weeks, starting with a measured outline, then addition of oil pastels for colour using David Bomberg’s paintings as an influence. In the second session, we then broke down the oil pastel with turpentine before adding the background and working into the figure more. The figure isn’t dark enough with the addition of the background, so some of the form is lost as a result. Many thanks to our model for allowing me to share the image (and for sitting so patiently!).
Mixed Media Still Life #3
It’s Friday, and another mixed media lesson 🙂
This week we had to do a candle wax resist rendition of the still life – clear wax on whitish paper made the initial stages very tricky. However, as the dye wash revealed, I did fairly well! A bit of charcoal and a smidge of oil pastel here and there, and I was done.
Mixed Media Still Life #2
Life Drawing – Term 2 – Week 3
Here’s my life drawing from this week at college. We are experimenting with expressive strokes in black Quink ink washes, and this week added in rust colours using oil pastels. The black Quink is ideal for this as it is full of every blue and brown colour you could wish with a few grey tones chucked in as well! I used a blue, orange and brown for the rest of the colouring, blending as I went, over the top of the tonal ink washes.
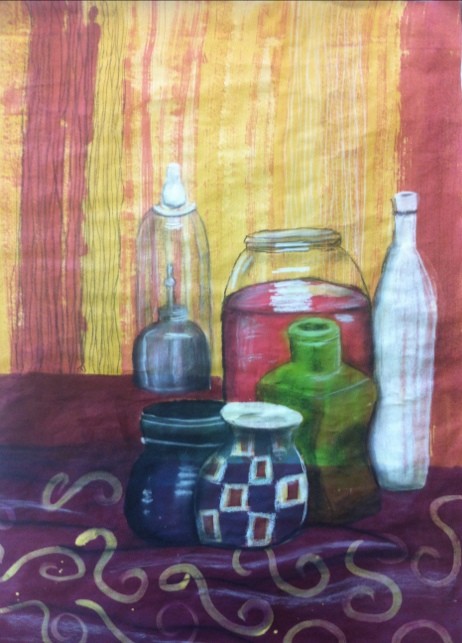
Mixed media still life
Foam Board Wave Machine
I’m doing a 3D module at college at the moment, and we have to design something with one moving part, to be made out of wood/acrylic. Of course I had ambitious ideas, and decided to mock up my proposal out of 5mm foam board to check that it worked. So here is my 3D, working, foam board wave machine, starring a kebab stick!
I’d love to post a video of it in action… but I haven’t quite got the right facilities to do that just yet 🙂
This took about 90 minutes to make, with no templating or pattern. The base is A5 size, the discs the diameter of a 10 pence piece secured with a bit of glue. It was really exciting to give the kebab stick it’s first turn and see the wave pattern go across!
College – Still Life – Weeks 6 & 7
It’s the end of term and hand-in time – and here’s what I’m handing in for my still life module. Hopefully you can appreciate that it’s a close up of a hydrangea head, and see that we’ve been concentrating on learning about tone and form this term. I’m really pleased with it, and once again the charcoal ground works wonders!


