I’ve been playing with various watercolour effects, out of curiosity more than any thing! Thought I’d share the results, just in case someone else might be interested… All of them feature a Stampendous stamp (Cling Poppy Scene #CRM234).
Tag Archives: watercolour
Distress palette distress!
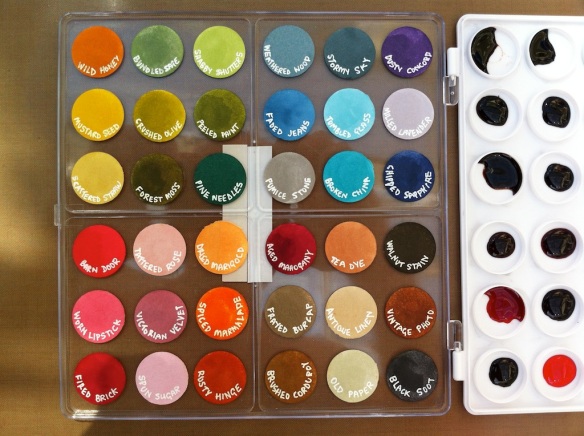
Well, I thought I had it covered… I took my distress ink palette with me on holiday, intending to do some distress water colouring while I was away. I popped it in a bag with a piece of kitchen towel, sealed it up, placed in flat in a box, flat in the car boot and off we went. It seems that somewhere along the 4 hour drive to Holyhead, the ferry crossing to Ireland and 1.5 hours driving in Ireland there was sufficient rock and roll to slosh things about a bit:
Needless to say, I didn’t get any water colour done with this palette – I had to use my distress markers instead. I decided not to waste the lovely colours and used an adaptation of my paper towel printing technique to produce lots of lovely coloured napkins for backgrounds and decoupage:
I have several plies of the oranges, the blues and the greens ready for my collages and bits and bobs. After I’d rescued and used what I could, I set to washing up the mess and replacing the colour swatches on the lid. As you’d expect, all the inks rinsed off the plastic leaving no residues, unlike the stickers which left their adhesive behind – no matter, it just helps the next ones stick more! A couple of hours later, and my palette is restored:
A happy accident? Time will tell as I use up the various bits of kitchen paper I used to blot up the mess in my artwork – watch this space! I would also like to find a thin sheet of silicone/rubber to seal the palette for the next trip – or thin one inch rubber washers to stick onto the lid. The palette is great, both in construction and price – but it sooo isn’t water tight! I’ve also learnt to only use half a dropper full of ink in each well rather than the full one I did first time round!
Twelve Tags of 2012 – July and August
I have been creating, honest! I just can’t share some of what I have been doing due to commercial sensitivities, but as soon as I can, I will… and some of my creativity is on projects that are taking just that little bit longer to complete.
But I can share these two tags that I have done for this month’s Manic Stamper Craft Club, continuing my series of Twelve Tags for 2012. The first features triple embossing and a smidge of the frosted window technique for the ripples, as well as paper crafted water lilies. The second is napkin decoupage with a stamped and coloured image artfully placed on top. Fuller instructions will follow on the Manic Stamper blog once term has finished!
Drypoint print – the gallery editions
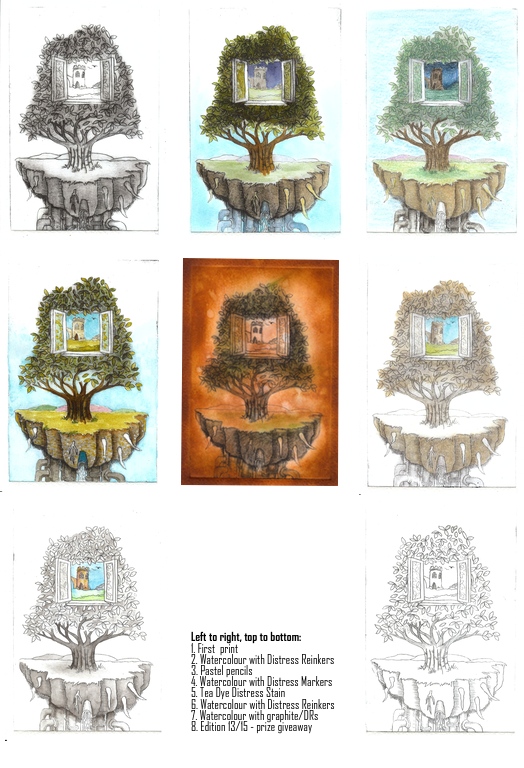
As I mentioned in my original post, I planned to further work on my drypoint prints, adding tone and colour. Here is a gallery of the results – and the bottom right is the print I have given away, number 13 of 15 – and may be the winner will want colour added? Most of these are now mounted for the end of term exhibition. There are some other prints available to purchase if you’d be interested…
I think some work better than others – I’m not happy with the tea dye one, it’s too dark. I am happy with the greyscale/monotone trees with the colour window. The pastel is very much in keeping with Jacek Yerka’s work on which this is loosely based as he prepares his paintings with a pastel version first. Let me know what you think 🙂
Creative Chemistry 101 – Day 4

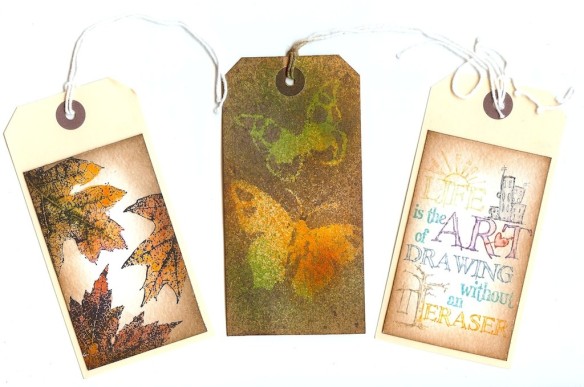
It was Creative Chemistry 101 Day 4 – but I was a bit busy, so I’ve caught up on Day 6, and that’s only because I don’t have my hands on any Distress Markers yet! So back to Day 4, and we were exploring Distress Reinkers, using them as watercolours, sprays and for inking up custom stamp pads. The autumn leaves work really well as watercolours and the reinkers blend wonderfully. The sprays didn’t work quite so well, and there’s a bit of Perfect Pearl in there from previous mixes which might not have helped. By the way, Heidi Swapp masks are not heat proof… And finally the custom ink pad was easy to make, but I found I had to work fast to get ink on before the previous colour had oozed its way across! I stamped the image and then pulled some of the colour from the lines to fill in the white areas. All of the tags have been distressed with trusty Vintage Photo DI round the edge.
Creative Chemistry 101 – Day 3

It’s Creative Chemistry 101 Day Three and we’ve learnt about the properties of oil-based Archival Ink from Ranger. I only have black at the moment… which makes some of the homework a bit tricky. Tag one is the alcohol ink agate background with images stamped in Archival Ink, tag two is the Archival Resist on glossy paper (only I substituted Adirondack pigment inks, which of course are water based and not going to do the same), and tag three is the Reflections Stamping onto embossing folder – only I don’t have the Reflections stamps, but I practiced the principle! Not my best work as I’m rushing to get done in time to go set up at the NEC and got them done in 40 mins 🙂
Creative Chemistry 101 – Day 2

I’ve enrolled on another course – this one is online and is a 10-day delve into the world of Ranger inks and other products lead by none other than ‘Professor’ Tim Holtz. Creative Chemistry 101 Day One introduced us to the various types of ink and their properties. Day Two was exploring distress inks, and for me was a revision of blending and spritzing, watercolour stamping and wrinkle free distress. Here’s my homework tags:


