Just popping in to share ten tags I’ve made with Craft Label / Dovecraft Premium Winter Wonderland paper pad and coordinating embellishments. Each tag started off as a 6×12 cm manila tie-on tag before I stuck down the various elements, trimming the paper to match the tag. Includes some glitter domes coloured with Nova designer markers (set of blues), Glossy Accents and mini gift bows.
Tag Archives: embellishments
Craft Label DT: Finding Paradise
Craft Label have sent me a new pack of goodies. Not only are their packing boxes secure, but they’re also polka-dotted and there’s an encouragement in every one to get making. The Finding Paradise set includes paper pads in all sizes (12″, 8″ and 6″ square) along with numerous embellishment packs including coordinating washi tape, clear stamps and toppers.
Craft Label DT: Butterfly Kisses Cards
The brand new papercraft and embellishments set from Craft Label and Dovecraft is ‘Butterfly Kisses’. The palette is green, purple and pink with some of the papers glittered and silvered. There are floral (roses) and geometric patterns, and of course, there are butterflies galore. There are three paper pad sizes: 6×6″, 8×8″ and 12×12″. The embellishments include mini-pegs, painted toppers, holographic butterflies, fabric brads, dies, clear stamps and resin roses. There are bundles available too with savings to be had over individual packs. Subject to stock, all items are available here.
Here is the result of a couple of hours work, two trios of decorated cards:


Craft Label DT: Christmas Decoupage
 A quick and simple decoupage project, these upcycled powdered drinks containers could be used to hold candy canes, breadsticks or even Christmas potpourri. Paint over the drinks containers with black paint/gesso or be prepared to do a couple of layers of the decoupage paper to cover the text/pattern on the containers. Glue on the strips of decoupage paper with the decoupage adhesive and varnish and allow to dry.
Line the pots with paper from the North Star paper pad.
I decorated the blue with the foiled stars from the North Star paper pad in two strips edged with silver peel-off borders. Embellish with a mini gift bow and silver Merry Christmas sentiment. I’ve added a few glittered half-pearls in two sizes as a finishing touch.
I created a wreath effect on the red pot with alternating felt poinsettias and gold mini gift bows before glueing down one of the wooden Merry Christmas sentiments. Quick extra embellishments to finish: gold peel-off borders top and bottom and some gold ‘nail heads’ (sequins would also work here).
As it’s Black Friday, there’s a 3 for 2 promotion over on the Craft Label webshop, so pop over and get hold of the following to do this project!
- First Edition Christmas Deco Mache decoupage paper: Sentiments / Snowflakes
- First Edition Deco Mache decoupage glue adhesive and varnish: Matt
- First Edition Deco Mache brush set
- First Edition FSC Christmas Paper Pad: North Star 6×6″
- Simply Creative Christmas Mini Gift Bows: Gold & Silver
- Simply Creative Basics Felt Image: Poinsettias
- Simply Creative Christmas Wooden Sentiments: Merry Christmas
That’s Crafty! Show Samples: Christmas
Following on from yesterday’s post, here are the Christmas demo samples I made for the live Hochanda shows. Unfortunately, we seemed to enter a time warp for the final hour, and there was not much time to go through all the demos I had lined up.
 Merry Christmas Wreath
That’s Crafty! Surfaces MDF Wreaths and Baubles Set
That’s Crafty! Surfaces Bits & Pieces Greyboard: Christmas Sentiments 2
That’s Crafty! Surfaces Bits & Pieces Greyboard: Holly & Mistletoe
That’s Crafty! Surfaces Bits & Pieces Greyboard: Christmas Florals 2
That’s Crafty! Multi Surface Paint: Christmas Red / Green / Purple / White
That’s Crafty! Multi Surface Paint: Antique Gold / Gold / Silver
That’s Crafty! Multi Purpose Craft Adhesive Pen
Try mixing different colours to make shades of green – red for a warm brown, purple for a rich evergreen. Use Craft Adhesive for a doming glaze over the berries, and a glaze for the leaves.
That’s Crafty! Show Samples: Autumn
As always, a quiet blog usually means frenetic activity in The Studio. The start of this month has been no different, with not two, but three live hours of craft TV demos to prepare for. And, as usual, there was a press embargo on sharing the products, or the samples, until the live shows aired.
So, without further ado, here are my samples for the Hochanda shows that aired on 18th August 2017. Please let me know if you’d like fuller instructions on how to make any of these, I’ll see what I can do. Later this week, I’ll also do a review of the new That’s Crafty! Multi Surface paints based on what I learnt making the samples.
’tis the season
That’s Crafty! Multi Surface Paint: Black / Christmas Red / Yellow / Brown
That’s Crafty! Multi Surface Paint: Metallic Gold
That’s Crafty! Bits & Pieces Greyboard: Acorns and Leaves / Leaves
That’s Crafty! Bits & Pieces Greyboard: Christmas Sentiments 1
That’s Crafty! Surfaces Set of 2 MDF Shadow Boxes [small]
That’s Crafty! Multi Purpose Craft Adhesive Pen
Use the Craft Adhesive as a doming glaze for the berries. The metallic gold adds a little bit of shine to the leaves.
Two new workshops added
I’ve just updated my workshops page with two new sessions:
Make Your Own Embellishments – Saturday 5th October (£25)
 A day of demonstrations and practical hands-on experience making your own embellishments for card making or scrapbooking: includes tips and tricks for colouring, moulding, shrink plastic, customised ‘metal’ tags, paper and fabric flowers, colour coordination and embellishing die cut lettering. If you have a layout in mind, bring your photos and make your own bespoke embellishments to match.
Painting with Powertex – Saturday 2nd November (£50)
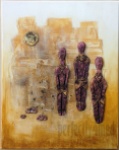
 In this session we’ll be using Powertex (a specialist pigmented liquid fabric hardener) as a paint. You’ll explore building up layers and texture on canvas and on a frame, making a complementary air dry clay to create figures or shapes to embellish your piece, and learn techniques to colour your pieces further with powered pigments.
For more details, pictures and to book online, go to my workshops page. Full terms and conditions are also available using the link at the bottom of the same page.


 Merry Christmas Wreath