Here’s my November Craft Club project – more distressing and emboss resist work, this time using two colours direct to the card, and a tag thrown in too:
Tag Archives: distress
Christmas Tag Cards
Here’s what we did at Craft Club last Saturday: I’d have posted them sooner, but they weren’t perfected until late the Friday before! Read on to find out where the pitfalls are…
Handmade Books – workshop samples
I’m leading a workshop during the afternoon of 22nd October (see About Me page) creating handmade books – I hope that we’ll get to make all three of the samples below:
Adventures in Heat Embossing
I’m demonstrating all sorts of things heat embossing on 22nd October (see About Me page), and finished off my demo board this morning:
And here’s a close up of the faux dichroic glass piece for those that like shiny things 😉
Summer assignment – ‘about me’ postcard
There’s just a week to go before I finally start my extended diploma in art and design course at Leicester College, and I must admit looking forward to it. We were set a summer assignment to create an A5 size postcard, with the front being a collage describing ourselves, and the reverse carrying the college address and a description of what we’d been doing over the summer.
I started work on it last week, and yesterday I finished my submission:
Mini-Suitcase Memory Boxes
And this is the second part of the demo/workshop day to be held at Kim’s Crafts (Hinckley Branch) – mini-suitcase memory boxes:
Perfect Pearls – demo board
Hi all – I’ve been feverishly working away the last two days getting ready for my next demo/workshop day at Kim’s Crafts (Hinckley Branch) on 10th September. In the morning, I’ll be demo’ing all things Perfect Pearls (from Ranger) and this is the demo board I’ve just finished.
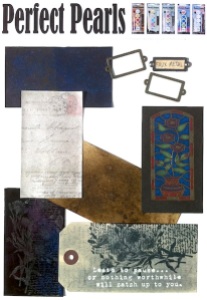 I’ve just found it’s next to impossible to photograph pearlescent finishes! But the board shows the basics of applying perfect pearls to medium, then painting on a pearl finish to spritzing with distress inks, stamping over distress stains and inks, and bottom left, applying to UTEE and watching it ooze.
Mini Travel Journal – Maspalomas 2011
As promised, here are pics of my handmade travel journal. I decided that I would take an art journal with me on holiday and I’d keep to a plan of drawing/writing daily – after all, I’d have the time! Well, that didn’t quite work out between sun and sangria and nights of cards and local honey rum, but I have finished it:
I’ll be showing the group at the Craft Club on Saturday how to make the journal, and there will probably be a tutorial coming on here later.
Paper Towel Printing – Distress Inks
I’ve carried on playing with my newly discovered technique, and thought I ought to try Paper Towel Printing with distress inks. Here’s a step by step guide:
 Firstly, place your sheet of paper towel onto a glass mat or other non-absorbent surface. Wet by spritzing with water.
-=-
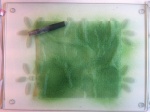 Then I spritzed with homemade glimmer mist spray – good to have a background colour. I think it also helps the other colours keep in their place… This one is Peeled Paint with gold perfect pearls.
[To make your own mist – take one dropper full of reinker and add it to a mini-mister. Add a small scoop of perfect pearls. Fill with water to three quarters full, replace cap and shake vigorously. Spritz.]
-=-
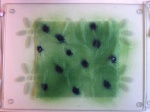 Drop on ink from your choice of distress ink reinker – this is Faded Jeans.
-=-
 Spritz each of those dots with water until they start bleeding.
-=-
 Repeat with more colours – this is Spiced Marmalade.I also added Dusty Concord.
Spritz with water.
-=-
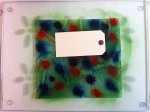 Start printing! Lay a tag/paper/cardstock/ATC on the towel and smooth down with your fingers. You may see water squeeze out of the edges at first – that’s what you’re after 🙂 You’ll also find the colours start to spread a little more into one another.
-=-
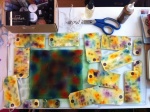 All of this from one sheet? Yup – and they are all double-sided as well. It seems that the colours stay pretty much where you put them, so this would be great to carry a colour theme throughout a tag book, or art journal, or across several pieces of cardstock for scrapbooking or card making.
-=-
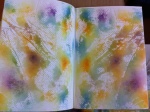 And there was still some left over to do my art journal 🙂
-=-
 Close up of the tags – they’re a bit blotchy still as I didn’t wait to dry them before sharing this blog entry with you! Lots of texture on some, lovely watercolour effects. Love it!
Gelatin(e) Printing – test run
It’s been a busy morning – very creative vibes. I was reading about gelatin(e) printing yesterday afternoon, and set a gelatine gel plate overnight. I managed to get the sheet more or less intact out of the baking tray using a smidge of hot water round the base and sliding it onto a glass mat. And these are the results of my first play 🙂


