CC102: Day 1

Day 1: Distress PaintsThe longer-term followers of this ‘ere blog will probably vaguely remember that I did Tim Holtz’s Creative Chemistry 101 online class last year. He’s only gone and started CC102 today – there’s thirty more techniques he’s sharing – and of course I had to sign up. So here’s Day 1: six things to do with Distress Paints. I’m not allowed to share the techniques, but you won’t need to look far elsewhere on my blog to see where I have used them with conventional acrylics. That is, all but the first – the marbling effect is unique to Distress Paints because of their make up.


College Course – Term 6 – Final Exhibition

Where has two years gone? Seems to have flown by! And so, I come to the close of my course, and here are the pictures of my final exhibition. I have studio pictures of the final pieces to post as well, and they’ll come in due course. I’ve used a bit of Photoshop jiggery-pokery to get some of the detail right in the exposures, but the light level on the day was more the dome pic than the globe pic (i.e. not as dark as I’d like, but hey ho!).

Keep an eye out for the individual pieces as they will be for sale, complete with free light! I don’t have enough room to store them or display them, so it’s only right they should find a new loving home 🙂

College – Term 5 – Final Ceramics Piece

This piece from last term won’t be exhibited at my end of course show next week, so now it’s been fired and assembled, I thought I’d share it with you here 🙂

The brief was to create a ‘Cornell style box’ (i.e. an assemblage) based on my chosen collection, which, for last term, was beads. The base and top were scaled up from a metal filigree bead, with the top flowers being formed from a mould made using lucite beads. The hanging flowers were sliced from a clay extrusion using my own custom laser-cut perspex die and then individually hand carved and pierced. The clay used was earthstone which goes cream/white when fired, and I decided to keep it unglazed.

The filigree section was formed by sticking down D-shaped extrusions to form the pattern, using slip, and then I used a fine potter’s knife to cut out the enclosed sections. This obviously took the most time! Just as the box was finished, I managed to drop it – a gut-wrenching moment, but happily not much got damaged and the clay was still soft enough to work out the kinks. After that, I was a lot more careful!

College – Term 6 – Final Major Project – another light shade

It’s another light shade, this time featuring cut-outs using silhouettes based on my own observational drawings. I’ve cut the silhouettes from heavy interfacing, used Bondaweb to fuse to a layer of white cotton, and then machine stitched them onto the card frame.


And this afternoon, I spent a couple of hours in a darkened room. The stress hadn’t got to me (though the same can’t be said for our tutor this morning!), but the need to photograph all my creations to date had. Here’s a selection:

lampshadewpheader.jpg

College – Term 5 – Final Major Project – another paper craft light shade

Well after a flurry of activity over the last two weeks watching my new studio get installed, and then decorating it, constructing furniture and moving in – as well as emptying out and putting back to right the dining room, conservatory and some of the craft room – I have my first ‘working’ day in the studio.

Of the various things I have to catch up with, college work is one priority as I have a mid-way assessment tomorrow. Consequently, I have taken pics of my latest light shade in my series. This one features one of the patterns I gleaned from a visit to the Islamic artefacts at the British Museum, drawn into Illustrator, adapted for the round and then screenprinted in opaque white ink onto thick tracing paper, and then constructed onto a card frame. As with the previous post, here are photos of the shade in daylight, and internally lit at night.

College – Term 5 – Final Major Project – Paper crafted light shades

It’s already March, and only two weeks before we finish Term 5. One more term to go, and that’s my college course done and dusted. If it weren’t for my new studio to look forward to working in, and the list of jobs to do in the house, I know I would be dreading the end of college. Though I was unwell last week, I did carry on with my final major project. It’s grown out of looking at Islamic geometric patterns – I’ve learnt to construct geometric shapes with a compass and ruler, transferring them into Illustrator, and then finally applying them to 3D polyhedra. I settled on a truncated cuboctohedron as my main construction, and played about with various construction techniques.

Here are just four of the anticipated dozen final pieces. Some are uninspiring in daylight, but come alive when internally lit. Others inspire in both lights. I can tell you that I got a blood blister in my finger tip from all the scoring of folds. I can reveal that the shadowfold light required 360 separate knots. And that I stuck down each of the 400 petals on the frilly one! All are handcrafted (though I did use the Cricut machine to cut out the shapes to my design!) and nothing more than fabric or paper and glue. They are roughly 6-7 inches in diameter and designed to sit over an inexpensive battery powered LED light (£1 for two in Poundland!).

College – Textiles – Term 4 – Final Project

The choice of final project in textiles was to either design and make three tea towels, an apron or a Cornell-style fine art box. I followed my ceramics theme and chose the box, and thus embarked on a project to include every technique I could think of to transfer my patterns from my sketchbook to my ‘panoply of patterns’. Here’s the completed box, complete with my display sheets displaying its contents:

Completed-box---closed


Lots of techniques in here, from free hand drawing with a fabric gel pen, to free motion machine stitching, backstitch hand embroidery, iron on transfers, applique, fabric paint and quilting to name but a few…

College – Print – Term 4 – Final Pieces

This term in my print lessons I’ve revisited dry point – with a new twist which I hope to develop and share in due course… And then there was the lino cut – it turns out that lino is a lot easier to carve when warm, but crumbles when hot… And there was the collagraph – sticking items to a piece of card, liberally coating with PVA and allowing to dry before using it as a print plate. Part of the final project is to take prints that aren’t quite exhibition standard and embellish them a little:


Here’s the before and after of a piece of serendipity – I was washing out my large screen with a large repeat pattern on it, and the water/ink mix was caught by the scrap paper beneath – I loved the texture and distressed colours. I embellished it with watersoluble graphite pencil and a bit of frottage on sandpaper to add texture, and a distress ink mix to tone down the white paper:


Finally, I wanted to play around with a repeat pattern on a large scale… the screen alone was two feet square – and I chose to run off a couple of lengths of wallpaper as well as a couple of multicoloured prints:

Not sure that I’d want that repeat in black and white across the chimney breast!


College Course – Ceramics – Term 4 – Final Project

For our final project this term, we’ve had four weeks to work on either a ceramic bird house, or a Cornell-style box. In principle, we had to slab build the box and then use at least two of the techniques we’d learnt to decorate it. I’ve gone for the Cornell-style fine art box:

IMG_3339_wOnce again, all the work is based on my bead or button collection – the filigree is the back slab layered with D-shaped extrusions and then pierced (two techniques already!). The flowers are one and two part plaster moulds taken from other beads (sprig moulds, technique three). The box will dry over the Christmas break and then get fired – it’s white earthstone, and we’ll be playing with glazes next term. The box will hold vertical strings of ceramic beads, which I made by designing my own extrusion die, slicing this into uniform thicknesses, piercing and then carving (and there’s technique four):

College Course – Painting – Week 5

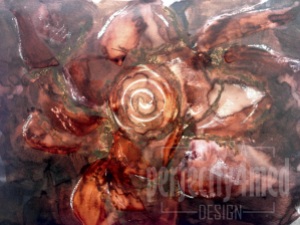
I’ve just been reviewing my myriad pictures and realised I hadn’t posted my favourite painting of the session so far – it was completed before half term. We worked relatively large scale (I think this was on A3 size paper) and were encouraged to be free in our movements with the brushes. It’s painted with watersoluble inks, resisted by oil pastel outlines and highlights, and I moved the inks around after application by flooding areas with water. A bit of thinned PVA adds shine, as well as more ink movement. I think the result is rather abstract, very free, and still resembles the rose bead I was using as a reference!

College Course - Painting - Week 5