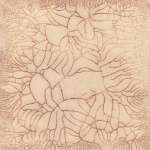
Another journal page using my new wooden block stamps – they work so well with the Dylusions paint. It’s just the right consistency to cover the stamp, stick to the page, and not squidge everywhere. Unfortunately it wasn’t quite the same when I used rubber stamps, which squeezed the paint away giving me the tramline outline that I then had to fill in with a paintbrush.
Tag Archives: acrylic paint
Art Journaling Page: Art for art’s sake
I was watching a film last night, and notice for the first time the motto above the roaring lion on the MGM titles: ‘ars gratia artis’ – art for art’s sake. What more apt saying could there be for an art journal page? This is part two of my bleeding tissue layouts – I stuck down the dried used up tissue strips using matte multi-medium over an acrylic paint background. I added more strips of Tim Holtz tissue wrap and tissue tape as well as some washi tape from Ikea. Finally, the text was printed using colour laser printer onto imitation rice paper to keep the tissue paper theme. The laser print has the benefit of not moving when using wet mediums over the top, unlike inkjet printed equivalents.
Art Journal Page: Tears of a Clown
I’m leading an art journaling workshop at the end of June, and thought I’d get a few more foregrounds on my many backgrounds in my various art journals. This spread already had the colour (distress inks over gesso with stencilled water bleaching) and the droplets (a Designs by Ryn rubber stamp). I searched in vain for a quote on water drops, but there was something about this phrase that sparked off the image of Pierrot, and the rest of the page came together.
The distress inks, being water reactive and dye based, reacted with the white pigment ink, white pigment pen and white acrylic paint I used, even after I tried to stabilise it with hairspray. I got round it using layers, and drying with a heat tool immediately after applying it. I added colour with Bombay India Inks, and coloured pencils. The harlequin tape is from Tim Holtz Idea-ology tissue tape range.
Art Journal Page: All Art Requires Courage
Tonight sees another of my art journaling sessions at The Studio, and we’ll be playing with the Dylusions Paints – blendable acrylics which are ideal for making backgrounds, and work well when used on rubber stamps as well. The text on this layout is stamped with Carnation Red Archival Ink and outlined with ultra fine tip Sharpie. The swirls are stamped with the Squeezed Orange before being dried and outlined and embellished with Signo white gel pen.
Altered Art: My ‘Sit & Be’ Windchime
I was once asked by a therapist if I could just ‘sit and be’. Back then, it was a concept that made no more sense than someone speaking double dutch. Nowadays, I have come to learn that it is at least something I’d like to aspire to, and am beginning to understand how to. To that end, I have spent some of today in the ‘now’ of creativity, converting the side panels of an old caravan belonging to my grandfather into this decorative all-weather wind chime:
The aluminium came from the caravan panels, and was coated with tar on one side and a thick layer of oxidation and algae on the other.
I used tin snips to cut out my discs, and a piercing saw to cut out the middle sections as well as the individual hanging shapes. A rub back with steel wool and turps, then a beating with a ball pein hammer before punching the text in gives the texture. I used Silks Acrylic to fill the text and add a splash of colour.
The texts are various reminders about taking time out to be still – for me, the reminders are still very much needed!
Never Been Used: more in my art journal…
I’m still trying to get a new trend going – tagging a post where I’ve used something that hasn’t previously been used by me as #nbu – never been used. One problem is finding time to do it myself! It’s part of my determination that nothing comes into my studio that I don’t then use in some way…. perhaps a rather weak way of justifying the purchase in the first place! Anyway, I finally did something last night with my Tim Holtz/Stampers Anonymous stamp set ‘Remnants’ (CMS130):
‘Made In The Image Of God’ Mirror
I’ve been using the tarmac technique again today, again on a trusty Ikea mirror. This time, I’ve used my Silhouette Cameo to cut shapes and letters from 300gsm card which I’ve stuck down directly to the frame. I kept the waste to use as a stencil later to layer the colours. Both colours are metallic, and much more iridescent in reality than in the picture. Careful masking with the waste layer and touching up with a brush allowed the lettering to be picked out against the main colour. I put an Art Deco style border around the mirror itself just to pick it out a bit more – of course, the viewer will be framed nicely. Add a bit of bitumen, rub back, and the piece is done.
Available to purchase (or order), £25, p&p extra. Please email with your requirements.
Crackle Effect Mediums – putting them to the test
I love a decent crackle effect, but it’s a notoriously difficult thing to get ‘right’ and nigh on impossible to get the same results every time. I noticed I have collected a number of different crackle effect mediums over time and thought it was time to do a side by side trial.
Mixed media cards
It’s demo time again for the Manic Stamper Craft Club, and I’ve spent the last four sessions teaching various techniques, including distress inks, image transfer, acrylic paints and myriad other art materials. There was a request that we take time out this month to put the techniques into practice, so I’ve spent a while in the studio coming up with these three cards:
The bath time one features image transfer, distress inks, and faux rusted enamel technique. The flowers use acrylic paints for background, stamping, tinting and covering metal embellishments. The final card uses the Ranger Summer Palette Challenge colours in distress inks, stains and alcohol inks as well as a bit of shine from Perfect Pearls, trying the capture the long car journeys for our summer holidays! Hopefully they’ll be enthusiastically received as examples of mixed media chemistry 🙂
College Term 4 – Painting – Week 4
More painting mayhem this week – this time we had to work large… very large! This painting is A1 size, with the viewframe being 4.3x3cm. I completed this in about two and a half hours, in acrylics, mixing colours from primaries and white. The rose bead and the filigree bead need a little more work, but I didn’t think it was too bad overall.