Possibly one of my earliest surviving artworks, from 1985 when I would have been 14… Later strips weren’t coloured and I used a typewriter to add the text. I seem to remember the inspiration stemmed from the fabulous Classical Studies classes led by Mr Boulting at school, where we were asked to do comic strips to illustrate the mythological stories of Ancient Greece and Rome.
Category Archives: Other Art Pieces/Techniques
Autumn arrives…
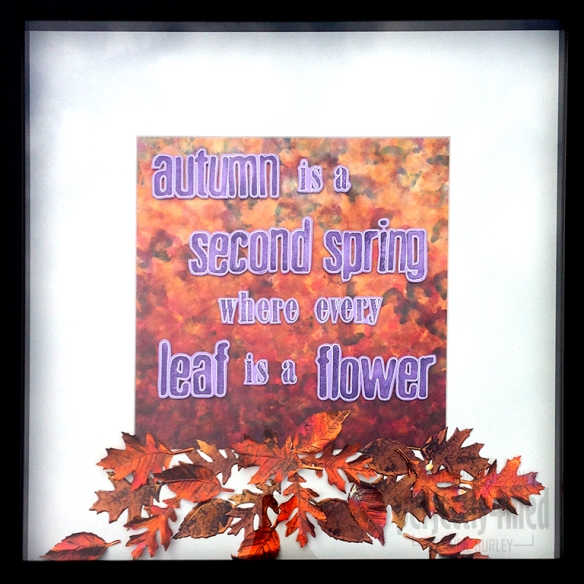
It’s officially autumn here in the UK, and on cue, the sun has disappeared, the temperature has plummeted and the rain is thrashing down! I’m having a go at getting on the Creative Expressions Design Team, and submitting a last minute entry to their design team call which closes today. As part of the application, I had to create a piece on the theme of ‘autumn’ and spent Wednesday making this piece. It’s in a 50cm square frame and features a 12×12″ alcohol inked glossy background, stamped and heat coloured embossed copper leaves and stamped and outlined lettering. For more making details, read on!
Arts in Worship
I’ve recently joined a new worship group at the church I’ve been going to since December 2012, Whetstone Baptist Church. As there are two of us trained to work the data projector, I was at a loose end a couple of Sundays ago, and thought I’d do some art work during the service. I’d had a couple of sheets of pre-coloured watercolour paper left over from a craft club, so took one of those, a permanent black marker, a white Signo pen and drew this during the services:
Inspired by words of one of the songs, and adding other lyrics and phrases from the sermon made this a specific act of visual worship for that service.
Encouraged by the response to this, I was then asked to do some more artwork to complement a service last Sunday where the plans for a new church building were to be revealed. The artwork was to illustrate ‘Waiting here for you’ to be sung as a duet, leading into a time of reflection and prayer. Using much the same technique, I blocked out areas using black acrylic ink after colouring the page using inks, ProMarkers, paints and stains. This time though, it was two days work prior to the service! These were the featured pieces:
The beauty of this approach, over stock imagery, is that the artwork can directly fit the emphasis of the service – in this case, I used the ‘wait’ text to illustrate several meanings of the word that emphasised anticipation and service rather than the more common sitting-around-twiddling-thumbs kind of wait.
I enjoyed the creative process, looking at all the different ways I could decorate the pages before blocking out the negative space. Some needed tweaking in Photoshop (for instance the addition of the lens flare in a couple), but most were unedited aside from adjusting brightness and contrast for data projection. I will definitely be doing more of this type of worship in the future, and may be even gearing up for ‘live’ artwork creation as part of the service.
It’s another giveaway…
I snuck in some ‘me’ crafting time at the end of last week, and spent 10 or so hours creating my next blog giveaway. As promised, I am going to celebrate 250,000 views on this ‘ere blog soon, and in honour of this will be giving away a piece of unique art. Here’s a sneak preview…
 All you have to do is leave a comment (constructive, spam won’t count!) somewhere on my blog – whenever I notice the views click over the 250,000 mark, whomsoever has made the most recent comment, gets the prize! It’ll help if you sign up for email updates as I shall be posting regularly between now and then…
Two new workshops added
I’ve just updated my workshops page with two new sessions:
Make Your Own Embellishments – Saturday 5th October (£25)
 A day of demonstrations and practical hands-on experience making your own embellishments for card making or scrapbooking: includes tips and tricks for colouring, moulding, shrink plastic, customised ‘metal’ tags, paper and fabric flowers, colour coordination and embellishing die cut lettering. If you have a layout in mind, bring your photos and make your own bespoke embellishments to match.
Painting with Powertex – Saturday 2nd November (£50)
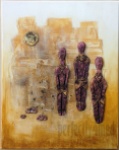 In this session we’ll be using Powertex (a specialist pigmented liquid fabric hardener) as a paint. You’ll explore building up layers and texture on canvas and on a frame, making a complementary air dry clay to create figures or shapes to embellish your piece, and learn techniques to colour your pieces further with powered pigments.
For more details, pictures and to book online, go to my workshops page. Full terms and conditions are also available using the link at the bottom of the same page.
Faux Stained Glass, Art Nouveau Style
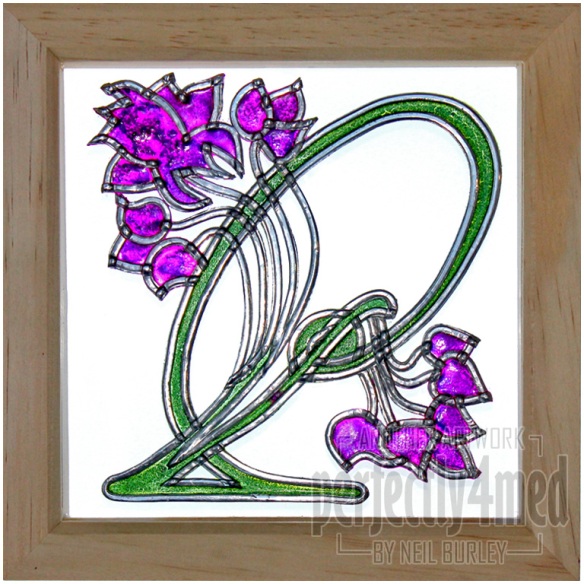
It’s another WOW! Embossing Powder Challenge, and my design team post this month takes their ‘Art Nouveau/Art Deco’ theme as its inspiration. I studied the period and art for a time whilst at college, and I loved the classic whiplash shape, the stylised botanicals and especially the stained glass. Here is my homage, using self-adhesive lead and embossing powder as my only materials (other than the 6×6″ deep frame…). More making instructions over at my post.
College Course – Term 6 – Final Exhibition
Where has two years gone? Seems to have flown by! And so, I come to the close of my course, and here are the pictures of my final exhibition. I have studio pictures of the final pieces to post as well, and they’ll come in due course. I’ve used a bit of Photoshop jiggery-pokery to get some of the detail right in the exposures, but the light level on the day was more the dome pic than the globe pic (i.e. not as dark as I’d like, but hey ho!).
Keep an eye out for the individual pieces as they will be for sale, complete with free light! I don’t have enough room to store them or display them, so it’s only right they should find a new loving home 🙂College – Term 5 – Final Ceramics Piece
This piece from last term won’t be exhibited at my end of course show next week, so now it’s been fired and assembled, I thought I’d share it with you here 🙂
The brief was to create a ‘Cornell style box’ (i.e. an assemblage) based on my chosen collection, which, for last term, was beads. The base and top were scaled up from a metal filigree bead, with the top flowers being formed from a mould made using lucite beads. The hanging flowers were sliced from a clay extrusion using my own custom laser-cut perspex die and then individually hand carved and pierced. The clay used was earthstone which goes cream/white when fired, and I decided to keep it unglazed.
The filigree section was formed by sticking down D-shaped extrusions to form the pattern, using slip, and then I used a fine potter’s knife to cut out the enclosed sections. This obviously took the most time! Just as the box was finished, I managed to drop it – a gut-wrenching moment, but happily not much got damaged and the clay was still soft enough to work out the kinks. After that, I was a lot more careful!Experimental Stencil Tag
I took a little time out from enjoying the [rare] sunny weather today to put together this experimental tag. I used the Random Circles mask from Tando Creative to deboss the circles – inked up with Spiced Marmalade Distress Ink, embossed onto a pre-decorated tag from my stash, and then covered with Vintage Photo Distress Powder for that authentic rusted look. I used the same mask to select areas of cardstock from the Tim Holtz Lost and Found stash and then stitched them onto the tag using my machine – stitching on card seems to be a bit trickier than into fabric! I aged all the edges with Vintage Photo Distress Ink. A few TH cogs and sprockets, and various metal embellishments decorated with Distress Paints are then added with brads before adding the florist ad from the TH stamp set. A bit of unravelled jute string finished the tag off nicely. Not really my normal style, but hey, that’s what experimentation is about 🙂
Handmade tag book
Over the last couple of days I have been putting together this handmade book as a potential project for a gathering of some of the UK course graduates of the Creative Chemistry 101 online course with Tim Holtz. The cover is made from 100gsm paper dragged through Distress Paints, which has the bonus of being waterproof once dry. The lining was done the same way. The pages are folded from A5 printed sheets of paper and stuck down the opening edge with 3mm wide double sided tape to form the tag pockets. They are handsewn for binding before gluing the spine and sticking into the cover.The completed book contains 25 different #5 tags with the instructions, and I probably need to explore a concertina binding on the spine to account for this…
[Book dimensions: 31/4″x51/4″ (8cm x 13cm)]

