
On my technique list for this month’s art journaling session was something using Perfect Pearls. I wanted to find a way of using their shimmer as more than just a background or highlight, and these loose, layered roses turned out to be a really simple Perfect Pearls technique. For the unfamiliar, these are mica powders from Ranger that contain a binder that reacts with water or Perfect Medium to set fast. Unsurprisingly, they leave a pearlescent sheen and work best on dark substrates. Combining this with an idea from a relentless Facebook feed, I came up with this layout:

How to copy this layout
Creating the Perfect Pearl roses

Fill a ziplock plastic bag with air and close tightly. Smear some Perfect Medium on a non-stick sheet and dab the corner of the inflated plastic bag until an even layer covers the corner. Then ‘stamp’ the corner onto the black card to leave a ‘petal’ shaped imprint.
Making note: Versamark reinker also works for this technique. I used reinkers as tapping onto an inkpad did not transfer enough medium to the bag.

A closer view of how the corner of the bag wrinkles up.
The wrinkles formed in the corner of the plastic bag are what create the loose, irregular petal shapes, so there’s no need to try to make every stamped rose look the same.

Apply Perfect Pearls to the medium. Pick up the powder from the jar with the small brush and flick it onto the card. Use the blusher style brush to blend the powder into the medium.

Wipe over with a dry paper towel to remove any excess Perfect Pearls from the surrounding card.

Fix the powder in place using a light spray of hairspray. I found this helped keep the first layer in place when adding subsequent layers.

Repeat the bagging process, rotating the bag slightly as you wish to fill in gaps with the next round of colour.

Apply a different colour of Perfect Pearls in the same way, wipe and seal.
Add another layer of ‘petals’ – I used a lighter press to have less petals and covered with a gold Perfect Pearl colour for some highlights on the rose.

For the leaves, cover a smaller piece of card by applying the Perfect Pearl pad direct and then cover with two colours of green powder for some variability. Wipe and fix as above.
Cutting out the roses and leaves
I chose to use my xTool F2 Ultra UV laser to cut out my shapes. If you have an electronic cutting machine (e.g. Cricut, Silhouette) then it will do the same job. The SVG files I designed are available for download below. If you don’t have a digital means of cutting, then punches or good old scissors will do the job.

Cutting out the leaves. The UV laser works by slipping between the very molecules of the card and wobbling them apart. There’s very little heat produced, so the cut is mainly smoke free when cutting and has no soot on the edges..

For the roses, I made outlines to cut out. The laser is able to trace that outline as a preview (see middle rose, right hand size) so that I can see the placement on the actual card.

The cuts are so clean! Placement and rotation of the cut lines are such that they complement the petal rounds.
The background

For a watercolour style background, dilute a drop or two of antique linen distress ink reinker onto a nonstick work surface, and dilute well with water.
Cover the page with clean water, then pick up the diluted ink and wash it over the page. Aim to have a pale, uneven finish. You can leave it to dry naturally or use a heat tool.
Building the page

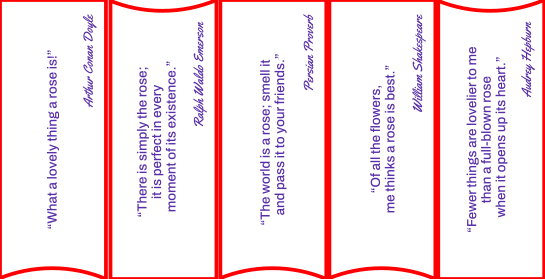
I searched the internet for quotes about the beauty of roses – there were loads that were more related to the thorns, or botanical descriptions which I decided not to use.
With more laser-cut shapes, I built up the display panels, gluing pieces into place and deliberately overlapping the roses over the frames.
The SVG files for the quotes and frames are also below.
Complete the page. I played around with the placement of the roses and felt this layout worked better than alternating the rose direction down the page.
Free download: SVG files
I’ve included my rose outlines, leaves, quote panels and lettering as SVG files below if you’d like to use them to make your own version of the page.


Next month
We’ll all be blowing bubbles – as normal, I have no idea what this will look like in the finished layout, but that’s the technique I have chosen for us to experiment with 🙂