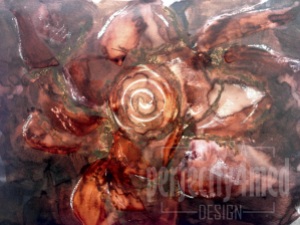
I’ve just been reviewing my myriad pictures and realised I hadn’t posted my favourite painting of the session so far – it was completed before half term. We worked relatively large scale (I think this was on A3 size paper) and were encouraged to be free in our movements with the brushes. It’s painted with watersoluble inks, resisted by oil pastel outlines and highlights, and I moved the inks around after application by flooding areas with water. A bit of thinned PVA adds shine, as well as more ink movement. I think the result is rather abstract, very free, and still resembles the rose bead I was using as a reference!
Tag Archives: painting
College Term 4 – Painting Week 1
I had to hit the ground running this week, with the first day back at college for Year Two, Term One. We’re starting off with six weeks of Jewellery, several weeks of Drawing, Life Drawing, Painting and lots and lots of Ceramics. Later on we’ll be doing some more Print.
The theme this term is ‘collections’ and we’ve been researching ‘artists who collect’ from those that seem to curate lots of objects (e.g. Portia Munson) to those who do assemblage (e.g. Joseph Cornell). I have to say I fail to appreciate the artistic creativity in curation, but I’m sure someone will put me right! I know these curated collections are art by definition, given it is commissioned and displayed and appreciated, but not what I would see as creative arts by any means.
Painting this week was set to stretch our comfort zone. We were handed bamboo pens, black Quink ink and told to draw our collections and then use clean water to move the ink around the page. We were encouraged to explore the media and work loosely. My collection is of beads and buttons, just in case you can’t tell from these images!
The ink has so many different colour pigments in it, more and more become obvious as it moves with the addition of water. Wet-on-wet creates more feathering, and translucent wash layers can be built up. I left the paper-white areas as highlights. It was difficult to add more ink back into the image as the paper had become more absorbent and spongy. I think I did ok…
Martha Stewart Craft Paints on Ceramic/Glass
I had an ‘interesting’ day yesterday at the fantastic Coleman’s Craft Warehouse Big Demo Day. I was billed to do a make and take with the Martha Stewart Craft Paints on Ceramics, but there was an unexpected influx of young children which resulted in me being asked to lead a children’s party next week! (I declined!)
That said, I’d done plenty of preparation for the make and take and here are pics of my samples. The plates are technique samplers and the text is written with a porcelain marker. All of the samples were baked, and are dishwasher safe – I actually tested this claim before I agreed to promote the paints, and I can absolutely say it does what it says it will do! The paints are more adherent than most acrylics I’ve used, and though water based, the box says not to mix with water – I presume this messes about with the resin technology that makes them multi-surface. You can thin the colour with the glaze product that is in the same range of products, which is how I managed to get the wood grain effect on one of the mugs using a brush. I would recommend applying the paint with a sponge onto non-porous surfaces and you can use a heat gun to make a layer workable, although it is not as stable as if left for an hour or so to dry between coats. The frosted glass effect paint is also applied with a sponge and is one of the most user-friendly frostings I’ve ever come across.
The paint itself is a creamy consistency, dabs on well and has good opacity. It comes in four varieties – a Satin Finish which seems more matte to me, a pearlescent – which is striking, a glitter – which is more of a coloured glitter translucent glaze, and a high gloss. The colour range available is comprehensive and there are various special effect bottles that I haven’t had the opportunity to play with.
I’m particularly impressed with the range of accompanying accessories, including the fine applicator tip that attaches to the bottle (see the high gloss black outlining) and the sponge dabber tips that do the same. Ms Stewart has also included an empty bottle in the pack which is for rinsing out the caps when done with clean water. Clean up is easy – as long as you do it while the paint is still damp. The paint by its nature sticks firmly and to any surface. I found that the stencils retained paint even after cleaning quickly after use, but any dried paint didn’t shift with subsequent applications.
To be honest, I’d probably use other acrylics for painting porous surfaces, but I’d certainly recommend these craft paints for any non-porous surface.

