I’ve been playing today 🙂 And one of the things I got playing with was a paper towel. I originally planned to dye it with acrylic paints/inks for decoupaging into my art journal. But one thing led to another, and before long, I’d ended up with what I think to be a totally novel technique – at least I haven’t seen it in all my hours browsing art journal techniques online. I’ll be calling it Paper Towel Printing, and this is the result:
Tag Archives: distress
Pink/Brown – Flower Power
I’m not sure what the rules are on multiple entries to the Passion for Promarkers challenges, but I’m submitting this one too! This is the second of my winnings from Some Odd Girl, Flower Kaylee. I found the combination of pink and brown a little tricky, but hopefully it’s come off.
Autumn Leaves Art Journal Page
I completed this double spread in my moleskine sketchbook art journal over the weekend. It uses my own art journal elements (the leaves) and the quote is from Albert Camus. Doodles are with Unipin fine line pigment pen. Background is blended Tim Holtz distress inks on gesso.
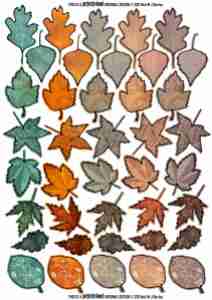
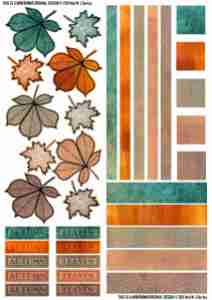
Art Journal Elements – Autumn
Ok, so it’s nearly spring… but the colours I’d used to make the background papers inspired an autumnal theme! This is my first attempt at creating decoupage sheets suitable for many things, but I had art journaling in mind when I came up with the sketches. Please feel free to print out the sheets and use the images in your own art projects. If you share the sheets, please make sure my name is still on them. The sheets may not be copied as a part or a whole to be re-sold in any format without my permission. I’d love to know what you used them for!
Click on the images to open an A4 size version that you should be able to save and print out. If you would like a high resolution version, let me know.
Glossy Background Variations
This is this month’s project for a card crafting workshop afternoon I teach on the third Saturday of each month in Leicester, UK. See my ‘about me’ page for more details.
Distress ink was applied to an A4 sheet of glossy card using a brayer: broken china, dusty concord and worn lipstick. I then cut the sheet into quarters and left one quarter as was [flowers]. The second quarter I sprayed with water and allowed to dry, giving a speckled bleached look [butterflies]. The third quarter I wiped some of the ink off with a baby wipe, before using a scrunched up vinyl glove to apply the same colour inks from the pad to the card to get a wrinkled look on a bleached out background [lily/gems]. The final piece was dabbed with a scrunched up moist baby wipe, again producing a bleached effect [tree]. Each piece was cut in half again (ie eight pieces from one A4 sheet). Images were stamped on with either black or opaque white Stazon ink, and matted onto bazzill cardstock. The tree foliage in this example was added after stamping the tree silhouette by dabbing ink on using the scrunched up vinyl glove (a scrunched up plastic bag or cling film would work as well). The gems on this occasion are dabs of Stickles glue in coordinating colours – but hotfix rhinestones or self-adhesive gems would work far better.
Art Journaling – napkin decoupage
I’m discovering art journaling, and so far am just doing the backgrounds. Today I tried ‘napkin decoupage’ – taking the printed layer off a two or three ply napkin and then using a matte gel multi-medium sticking it to the page. So here’s the result! The rose image is from a napkin (Cath Kidston,John Lewis) and the rest is acrylic paint applied with a baby wipe into my Moleskine sketch book – I gesso’d the page first. The large burgundy area next to the rose image resulted from the page delaminating under gesso and heat and the top layer of the page peeling off leaving a much more absorbent core exposed. Adds to the distressed look.


