Crafted from Caravans: The Christmas Collection

IMG_6545_wThe floor, tables and just about every other surface in the studio is currently covered with a fine layer of shredded wool polishing wheels and jeweller’s rouge… I’m also going to have to do a thorough wipe down of all the aluminium filings that didn’t hit the bin beneath…

I’ve been working in a production line over the last two days, making these hanging tree decorations. You may remember my ‘sit and be wind chime’ was made from the sidings of my grandfather’s old caravan – these are too. All are hand cut from the sheet aluminium, cleaned up with wire brush and wet’n’dry sandpaper, hand drilled and hand sawn, hammered, punched, filed and polished. Ok, I did use a Dremel for the polishing.

If you’d like a set, let me know – I will make them to order for £10 each including p&p to UK addresses (international orders extra), so if you’d like them in time for Christmas please order by the end of October.

Continue reading

Altered Art: My ‘Sit & Be’ Windchime

I was once asked by a therapist if I could just ‘sit and be’. Back then, it was a concept that made no more sense than someone speaking double dutch. Nowadays, I have come to learn that it is at least something I’d like to aspire to, and am beginning to understand how to. To that end, I have spent some of today in the ‘now’ of creativity, converting the side panels of an old caravan belonging to my grandfather into this decorative all-weather wind chime:

The aluminium came from the caravan panels, and was coated with tar on one side and a thick layer of oxidation and algae on the other.

IMG_5938_w

I used tin snips to cut out my discs, and a piercing saw to cut out the middle sections as well as the individual hanging shapes. A rub back with steel wool and turps, then a beating with a ball pein hammer before punching the text in gives the texture. I used Silks Acrylic to fill the text and add a splash of colour.

The texts are various reminders about taking time out to be still – for me, the reminders are still very much needed!

College Term 4 – Jewellery – Week 6 – Part 2

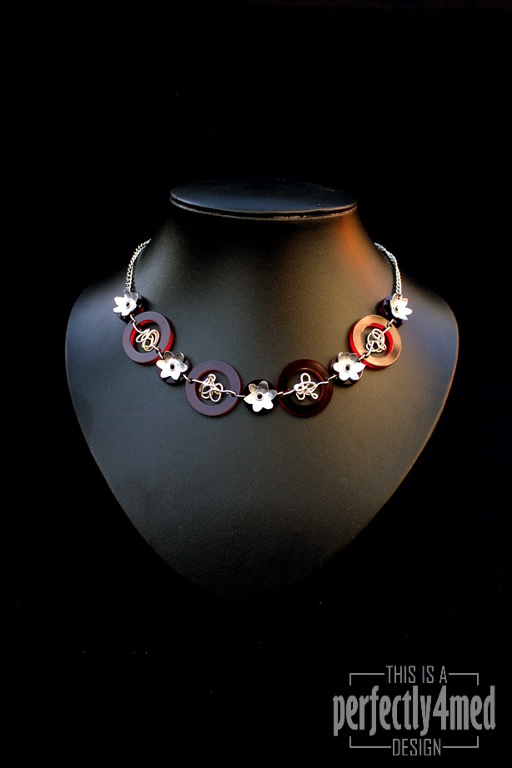
In a previous post you saw my aluminium and perspex necklace, bracelet and earring set. I also designed a second (bonus) piece using the offcuts from the perspex rings, and finished it today:

I’ve added silver wire tangles to the perspex rings. Each of the flowers were hand sawn from sheet aluminium and hammered into shape before being riveted onto the centre offcuts from the laser cut perspex rings. I’m planning to do two more flowers in the session tomorrow to complete a pair of matching earrings.

And I think I’m getting better at product photography! Rather pleased with the serendipitous lighting on this one – early morning in the conservatory with a bit of level tweaking in Photoshop. No artificial lights were used in the production of this image.

College Term 4 – Jewellery – Week 6

We’ve spent the last five weeks learning about the various ways of soldering (butt and sweat), cold joining with rivets, surface design (heat colouring, mill impressions, hammering) and playing with a laser cutter (I want one!). This week over five hours of lesson time, it was our time to make our own design – this is what I came up with:

Each of the metal discs were cut by hand from aluminium sheet, hammered to give texture, and wire brushed to make matte. I designed the acrylic flowers and circles to scale in Adobe Illustrator and these were cut from 3mm acrylic sheet on the laser cutter. They are attached to the aluminium discs using 2mm chenier tube rivets – several had to be done again as I was a little heavy handed at the beginning and cracked the acrylic. Links are commercial jump rings, as is the chain – time pressures didn’t allow me to make my own. Not that I’d know where to start making chain! I’m really pleased with the result, and aside from the laser cutting, all the techniques are feasible in a home studio.