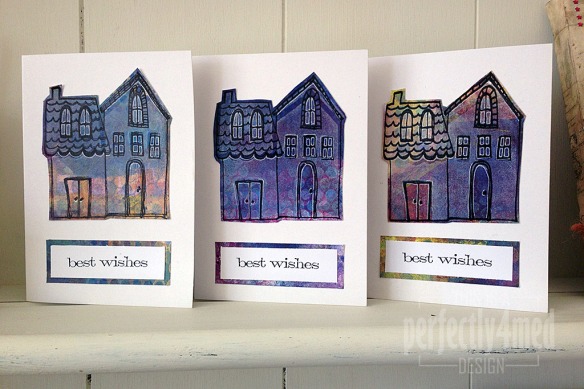
I’ve been forced by circumstances this week to not have a creative outlet, and I’ve come to realise that’s not a good idea! I’ve snatched time though, today, to practice the Gelli Plate technique I’ll be teaching in my Art Journaling Session on Monday evening. There will be spaces available – if you’d like to come, just get in touch.
[Monoprint panels using Chipped Sapphire/Stormy Sky Distress Paints and white acrylic paint; background from cleaning the brayer; text in Posca white acrylic marker.]Category Archives: Printing
Art Journal Page: Simply Marvellous
 Another journal page using my new wooden block stamps – they work so well with the Dylusions paint. It’s just the right consistency to cover the stamp, stick to the page, and not squidge everywhere. Unfortunately it wasn’t quite the same when I used rubber stamps, which squeezed the paint away giving me the tramline outline that I then had to fill in with a paintbrush.
Art Journal Page: God’s handwriting
 I’ve just taken delivery of a set of wooden fabric printing blocks, a commercial take on the carved versions typically seen in India/Indonesia. As well as printing onto fabric, of course they’re suited to printing onto paper as well, and what better way of using them than in an art journal? This page is in my Moleskine journal that has been somewhat unloved since starting art journaling in 2011. I already had a pink/purple background in place, and I augmented this with some dabs of Dylusions paint. The image transfer of some heuchera leaves was also already on the page, and I’ve blended the edges with some more paint as well as adding a smear of orange to colour. The block prints can be seen in purple and white at the borders. I was quite pleased with the right side especially, as the paint acted more as a glue, pulling off previous paint layers creating a serendipitous distress effect. The text is free-drawn in Signo white pigment pen and outlined with a fine black pigment pen, except for the final two words which I traced so that it was a little more ‘special’. For hand-drawn text, I found the book Hand Lettering: Simple, Creative Styles for Cards, Scrapbooks & More by Marci Donley and DeAnn Singh really useful as something to bounce off. We’ll be using the blocks in the Art Journaling Session on 3rd August, for which one place is still available to book here.
Mandala Faux Batik (for Creative Expressions)
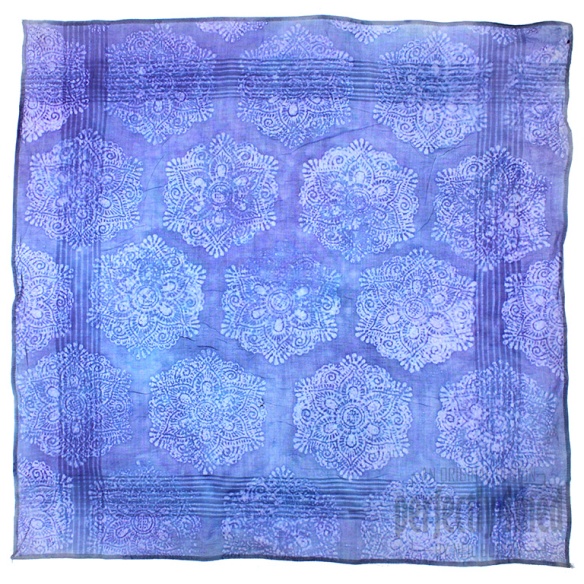
 When I saw the contents of the latest DT goodie bag lots of ideas sprang to mind. We’ve been sent the newest set of ‘Henna’ inspired Creative Expressions ‘Singles’ stamps – rubber stamps that are pre-mounted and cut ready for slapping onto your acrylic blocks and printing with straight away. This project uses embossing powder and spray dyes to create a faux batik effect on a handkerchief – although any cotton fabric would work just as well. For more making details, read on 🙂
College – Term 5 – Final Major Project – another paper craft light shade
Well after a flurry of activity over the last two weeks watching my new studio get installed, and then decorating it, constructing furniture and moving in – as well as emptying out and putting back to right the dining room, conservatory and some of the craft room – I have my first ‘working’ day in the studio.
Of the various things I have to catch up with, college work is one priority as I have a mid-way assessment tomorrow. Consequently, I have taken pics of my latest light shade in my series. This one features one of the patterns I gleaned from a visit to the Islamic artefacts at the British Museum, drawn into Illustrator, adapted for the round and then screenprinted in opaque white ink onto thick tracing paper, and then constructed onto a card frame. As with the previous post, here are photos of the shade in daylight, and internally lit at night.
Handprinted Quilts
I’ve just put the finishing touches to two small quilts. They both feature my own pattern design, which I hand screen printed at college onto fabric offcuts using black textile ink. The first shows the patten, unadulterated, quilted using black cotton and free motion machine stitch round each of the circle motifs. The second is dyed with Adirondack Color Wash sprays (which despite my best efforts still covered everything nearby!), dried, heat set, rinsed, ironed and then quilted in the same way. Both are hand bound and labelled. I use backstitch to hand sew labels for my quilts as this is unlikely to wash off! They are both 22.5″x42″ in size.
College – Print – Term 4 – Final Pieces
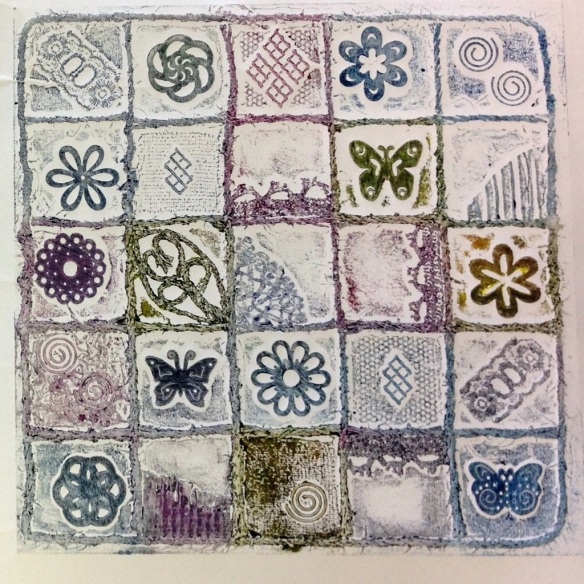
This term in my print lessons I’ve revisited dry point – with a new twist which I hope to develop and share in due course… And then there was the lino cut – it turns out that lino is a lot easier to carve when warm, but crumbles when hot… And there was the collagraph – sticking items to a piece of card, liberally coating with PVA and allowing to dry before using it as a print plate. Part of the final project is to take prints that aren’t quite exhibition standard and embellish them a little:
Here’s the before and after of a piece of serendipity – I was washing out my large screen with a large repeat pattern on it, and the water/ink mix was caught by the scrap paper beneath – I loved the texture and distressed colours. I embellished it with watersoluble graphite pencil and a bit of frottage on sandpaper to add texture, and a distress ink mix to tone down the white paper:
Finally, I wanted to play around with a repeat pattern on a large scale… the screen alone was two feet square – and I chose to run off a couple of lengths of wallpaper as well as a couple of multicoloured prints:
Not sure that I’d want that repeat in black and white across the chimney breast!


