Passion for Promarkers Challenge Week 99 theme: ‘for a teenager’. This DL sized card is my original design. The black base of the skateboard is wet’n’dry very fine sandpaper adhered to the card with Glossy Accents (a glue stick just didn’t do the job). The wheels and graffiti were drawn freehand, coloured with ProMarkers and given white highlights with white gel pen. The wheels are mounted on foam pads for a bit of depth.
Category Archives: Card Craft
Fit for a Princess
Another card for the weekly Passion for Promarkers challenge – this week the theme is ‘fit for a princess’ [Week 98]. I paid for a digistamp princess from Tiddlyinks as I couldn’t find my ideal princess for free. The castle and the frog are both drawn freehand. The sky and grass background were airbrushed using ProMarkers and Letrajet tool. I’m rather pleased with the result, and it’s going to be sent as a birthday card to our young princess friend 🙂
Dino Decoupage Card
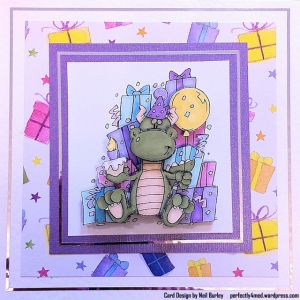
This week at Passion for Promarkers, the challenge theme is ‘pre-historic’ [Week #97]. For some reason, once I’d found my image, the need to decoupage it seemed overwhelming! I’m really pleased with the results. I also experimented with colour choice and used only ProMarkers with the middle digit 2 or 3 – this helps keeps the tones complementary. Please let me know what you think.
White-on-White Challenge
This week’s challenge over at Passion for Promarkers was to have an all white background with a coloured image. I found it a tough one to conceive, and then even trickier to photograph. Let me know what you think!
ProMarker Embellishments Card
This week’s challenge over at Passion for Promarkers is ‘make your own embellishments’ [Week 95]. I’ve used ProMarkers as part of each embellishment as well as on the main image. Hope you like it!
Yellow ‘n’ Pink Birthday Girl
This week’s theme over at Passion for ProMarkers is the theme ‘Yellow & Pink’ [Week #94] – and here’s my submission. The image is stamped in Memento Tuxedo Black and is available from Kars stockists [Dawn’s Stamps/Nellie Snellen DAWN-003]. Pens used: Skin – Blush/Oatmeal/Apricot; Hair – Gold/Sunflower/Pastel Yellow/Caramel; Dress – Cocktail Pink/Baby Pink/Pale Pink; Berry Red; Flower -Lilac/Orchid; Ice Grey 1.
Mop-up Tags
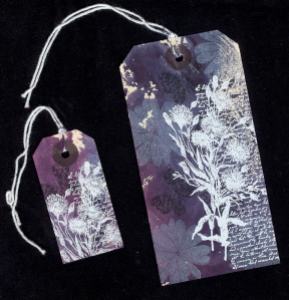
These two tags were part of a batch that I put together yesterday morning. I’d done the background colouring some time ago, dragging the tags through some dye overspray (mopping up) after I’d been colouring a cotton apron [Adirondack Color Wash: denim, cranberry and wild plum]. They’d sat on my desk for a while before I came up with the finishing touches: the flower is an Anita’s stamp inked with Stazon Opaque White, and the Laura Ashley [Dovecraft] butterfly and branch were stamped with Memento Tuxedo Black ink. These add layer and depth and form a lovely background for the white heat-embossed Penny Black letters and flowers [4035K] stamp. I used some as give aways and the rest I think will adorn cards or my art journal. Or possibly even some greeting cards.
ProMarker Butterfly Card
I’ve been busy this afternoon… I’ve finished this greetings card ready to enter into this week’s Passion for Promarkers Challenge (#93, ‘Bugs’). The butterfly [generic] is mounted onto a background [Personal Impressions Flower and Butterfly Background, PIRM002]. Both have been coloured with ProMarkers, and the flowers on the background have been decoupaged for depth. Paper Artsy Grunge Flower die used to construct the flower with Leone-Em punched shapes for the centre. Stamens were coloured with Gold ProMarker.
Clematis card
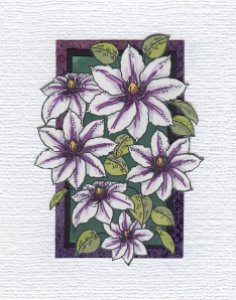
Remember the clematis pictures? Well, I worked out how to mount them to make a greetings card 🙂
I marked and then cut a rectangular frame (green section), and cut out all the background outside of the frame. I then matted that onto black card with a narrow border. That was then matted onto hand-coloured glossy card with wider margins, before mounting the whole thing onto a square, textured white card. The glossy card was sprayed with Adirondack Color Wash (cranberry, wild plum and denim), then water to merge and activate the colours, and then a sheet of kitchen roll laid onto it and then pulled off leaving the quilted texture in the wet ink. I’m rather pleased with the results 🙂
Glossy Background Variations
This is this month’s project for a card crafting workshop afternoon I teach on the third Saturday of each month in Leicester, UK. See my ‘about me’ page for more details.
Distress ink was applied to an A4 sheet of glossy card using a brayer: broken china, dusty concord and worn lipstick. I then cut the sheet into quarters and left one quarter as was [flowers]. The second quarter I sprayed with water and allowed to dry, giving a speckled bleached look [butterflies]. The third quarter I wiped some of the ink off with a baby wipe, before using a scrunched up vinyl glove to apply the same colour inks from the pad to the card to get a wrinkled look on a bleached out background [lily/gems]. The final piece was dabbed with a scrunched up moist baby wipe, again producing a bleached effect [tree]. Each piece was cut in half again (ie eight pieces from one A4 sheet). Images were stamped on with either black or opaque white Stazon ink, and matted onto bazzill cardstock. The tree foliage in this example was added after stamping the tree silhouette by dabbing ink on using the scrunched up vinyl glove (a scrunched up plastic bag or cling film would work as well). The gems on this occasion are dabs of Stickles glue in coordinating colours – but hotfix rhinestones or self-adhesive gems would work far better.


