Background Check: Day 5

BC_participantI’m a bit behind on my classwork as I’ve been meeting other deadlines, looking after my nephews (one of whom has been helping me make paper beads), but here’s my highlights for day five of my Background Check samples – which are all about texture.

Loving the faux letterpress technique, and going to have to experiment more with it. It’s great not having all the confetti after using the die! Again, nothing new here, but great exercise of techniques and reminders of what can make a clean and simple card really quite special.

Continue reading

Background Check: Day 4

BC_participantYesterday’s class was all about die cutting and how to use them in backgrounds. Now I’m not that much of a fan of die cuts, especially the confetti that covers everything with the really intricate ones. I decided to use a different approach, and cut out my cards using my Silhouette Cameo and designed my own shapes inspired by the dies used in the class.

The first is coloured with ProMarkers, and the second shaded with Picked Raspberry Distress Ink. The third is just the white cut out on a cream card – I think it’s a rather classy clean and simple design.

Continue reading

Background Check: Day 3

BC_participantDay 3 of my online card class, and they’ve introduced a fab idea – a ‘design break’. A chance to use what we’ve learnt in class to make cards. I didn’t have chance yesterday as I was prepping for a large workshop (news of this released next week…), so I’ve been making the cards this morning before today’s class is released. Here are my makes:

The text is all self-designed and cut from 300gsm card on my Silhouette Cameo. Colour added with distress inks, direct to paper. I love the results of some of these – not styles I would have immediately gone for, but very effective cards. Now to go and see what Day 4 has in store!

Continue reading

Background Check: Day 2

BC_participantIt’s Day 2 of my online class, and we’re playing with stamps and inks to make backgrounds. In the main today was revising techniques I’ve previously come across, but always good to see them used in imaginative ways by the tutors and yank them back to the forefront of my memory! Here’s today’s highlights:

Lots of stripes, and not a stripe stamp in sight. What’s a man to do? Go find some funky foam and cut that into strips. Add a bit of removable double sided tape, and ta da, strippy stripy stamps and backgrounds 🙂

I also like the idea of working more on mid-tone cardstock. I remember in college working on a charcoal ground and getting on better – you can use light and dark shades to emphasise shape, form and, in this case, pattern. I’ve been doing some zentangling on Strathmore Toned Gray Artist’s Tiles and finding the same (more of that in another post).

Continue reading

Ombré Stamped Cards

IMG_6240_w


It was an exciting day yesterday as several orders got delivered… I knew what was coming, but the ladies attending my Come & Craft session in The Studio were definitely living vicariously as I unpacked each one!

This morning, as I got to grips with my new varifocal specs, I decided to do a straight rubber stamped card – not something I have done for quite a while. To be honest, I don’t know whether it’s the glasses or the fumes from spray glazing some bowls that’s making things go swimmy…

I’ve used the new Hero Arts Ombré dye ink pads to make my cards. Each ink pad is made from three graduated colour strips and with a little shimmy as you ink up the stamps, you get great blended ombré effects. Above are four cards I made showing off several of the colours available. Ombré colours used: Pink to Red; Light to Dark Peach and Butter to Orange; Lilac to Grape Purple; Grey to Black. Stamps: background – Darkroom Door Harlequin; Tim Holtz/Stampers Anonymous Carved Swirl; flower is an old Anita’s stamp and the sentiment is Stampendous’ Cling Grunge Birthday.
Continue reading

Bunny Friends with Chameleons

IMG_6121_w

I’m not normally one to be grabbed by a ‘cutesy’ image, but this new rubber stamp from Penny Black / Margaret Sherry (dated 2009, so re-released?) definitely caught my eye. It’s one of those stamps that comes with a coloured image on the wooden block, which really helps those that need guidance on colouring in. I’ve used my Chameleon Pens to colour these in, which really came into their own for the shading on the pots. It took a couple of goes to find the right combination to get a good terracotta colour, which is why the pots are different colours between the two cards. The lettering is cut on my Silhouette Cameo – I found I need to set the cutter to ‘deep cut’ on the on-board screen, which meant the little serifs didn’t end up tearing.

When I met… Ken Oliver

This is a shockingly late, shameless promotion for all that is Ken Oliver. We’ve been Facebook buddies [like him here] for a little while (after all there aren’t that many gentleman crafters at shows and we need to stick together), and I have had the pleasure of saying hi a couple of times in person at trade shows. This February he was here in the UK promoting his new ‘own brand’ crafting goodies, and he was kind enough to do the whole selfie thing with me, demonstrate his new Color Burst watercolours and give me a promo pack of 12×12″ Studio series of papers and a 6×6″ sampler pack of his other papers.

IMG_6118_w

I thought I’d use the 4×6″ journal cards sheet from his Studio collection to start off my new Project Life scrapbook, and they worked perfectly. The papers are printed on a satin finish light cardstock which feels smooth to the touch. There’s no bleed through from the Sharpies I used for some of the handwritten text, which is a bonus when working on double sided papers. As one might expect from an artist that’s been in the trade for years, the designs and colours used all work together beautifully. One slight hitch I noted when gluing things down – the satin finish does resist water-based liquids a little, as I found when I was using Zig Memory Systems two way acrylic glue. Something to be aware of, though that didn’t turn out to be too restrictive in practice – it might be more of an issue if spritzing with water/Color Burst (something I’ll test out).

IMG_6120_w

Ken was also demonstrating his Color Burst watercolours. These are fine crystalline colours, conveniently dispensed from fine nozzle bottles. They appear to be similar to Brusho crystals (becoming very popular in the UK) in their reaction with water, both to make a watercolour paint, and in spritzing on the page to make vivid backgrounds. Where Color Burst beats Brusho, in my opinion, is the finer, more even crystal size and the fine nozzle capped bottle. I’ve knocked over a holed Brusho pot into my distress ink pad storage box, and the turquoise crystals continue to find their way into projects, much to the annoyance of my Tuesday night ladies… The reverse of my Project Life page shows a couple of samples from Ken’s beautiful Watercolored Memories 6×6″ papers (top left, bottom right), and the rest are Ken’s own demo sheets showing the vivid colours and dynamic reactions of the crystals with water on watercolour paper.

IMG_6119_w

Thanks to Ken for having a chat, demoing his fabulous products, and especially for the goodie pack. Sorry it’s taken me so long to fulfil my promise to post about our chat!

Chameleons on Noah’s Ark: trialling the latest alcohol markers

ColouredThe image I’ve used is a digistamp from The Stamping Boutique sponsors for this month’s Crafting Cafe challenge – check their blog later in the month to see the card I make with it.

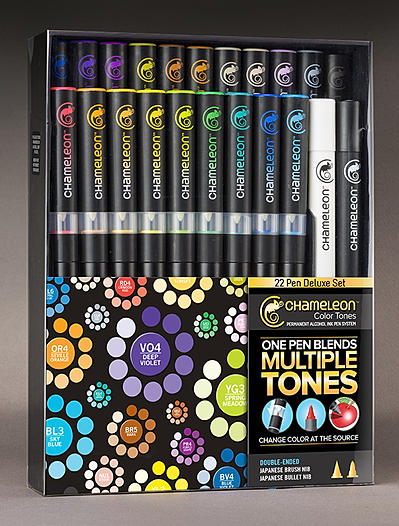
But the purpose of the colouring in was to trial and review the deluxe set of Chameleon Pens I recently purchased. There have been a fair number of reviews online, both good and bad, and a fair number of my Facebook friends had indicated they hadn’t got on with them at all and had returned them. I watched all the available videos I could find, as well as the shows on Create & Craft, found a good offer and went for the full set.

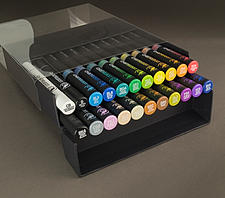
For the uninitiated, the pens are a basic dual tip alcohol ink pen – there is a bullet point and a brush-like nib. In addition is a reservoir of the solvent attached to each pen with its own  brush nib. In use, you put coloured tip to solvent tip, keep solvent on top and the pen upright for a defined period, and then start colouring – the solvent dilutes the colour, resulting in a tint which develops the fuller colour as the ink flows back into the nib. Thus from one pen, you can get all the shades. The ink on the page is also translucent, and along with other alcohol ink pens, blends whilst wet and overlays once dried. The deluxe pen set includes all 20 colours, a blending pen and a detail black pen, along with some spare nibs and an instruction sheet. They are in a handy holder which also presents the pens for use when open.

For my full review, read on… but in the meantime here’s the executive summary. I think in terms of colour intensity, blending, bleed and application, these pens are pretty much like-for-like alongside Letraset’s ProMarkers. Their USP is the many shades, one pen however:
PROS> no swapping pens constantly, no need for several pens or layers to shade light to dark, mix time allows for planning next area (i.e. time isn’t wasted). CONS>Getting large areas the same shade is very difficult unless keeping to undiluted pen colour; may need to use a different colouring method.

CONCLUSION: These are a great addition to my alcohol pens, and best suited to detailed images needing obvious shading. I’d not recommend them for large areas of same shade colouring – I’d stick with several ProMarkers. I certainly don’t regret buying them and definitely won’t be sending them back!

CCTPurpleDalia

Continue reading

Bespoke Wedding Invitations (Part 1)

The hardest thing about keeping my blog up to date with my crafty exploits is that some of my work has to be kept under wraps until the special reveal. So there may be times when I seem to be quiet – but in fact working frantically to meet deadlines!

Today’s post is one of those. A good friend asked me to make her wedding invitations – and now they’ve been sent and received, I won’t be spoiling any surprises 🙂

IMG_5773_w

Both Jess and Stuart are real ale aficionados, and we’ve spent hours together working our way through the bar at the Peterborough Beer Festival. What more fitting then than a personal hand pull badge? I drew the hand pull from reference photographs, and then scanned it and coloured it in Illustrator. The badge was designed in a combination of Photoshop and Illustrator. After creating print proofs, cut lines were created in Illustrator and sent to Silhouette Cameo using their Connect plug-in. It was then a matter of assembling the parts using 1mm deep foam pads to add some dimension (and allow avoidance of large letter postage).

By my reckoning, one can measure how successful a job has gone by whether more work is commissioned as a result. Happily, the couple are so delighted, I’ve been asked to adapt the design for the reception table labels.

Congratulations to the happy couple, all the best for the day, and here’s to another reunion at Peterborough in August 🙂

Continue reading

Eazi-Box: How to make shaped boxes with ease

I’ve just finished and published my first commissioned tutorial video, for Diamond Card Crafts. It’s evidence to me that LinkedIn is worth keeping up to date as this is where contact first started.

Back to the video: I show how to use Diamond Card Craft‘s Eazi-Box Shape Board to make shaped boxes, starting with an introduction to the board, then the basic square shaped box (equally able to do rectangular boxes btw), and then moving on to triangular, pentagonal, octagonal and short lid boxes. The board itself is a deeply moulded score board, with templates for the shapes which are so versatile and can also be used to make shaped cards and mats as well. I share tips and tricks that aren’t in the instruction sheet for perfect boxes every time.

[youtube=http://youtu.be/75whxyt6DeQ]

Continue reading