Layered-Paper Rocking Horse

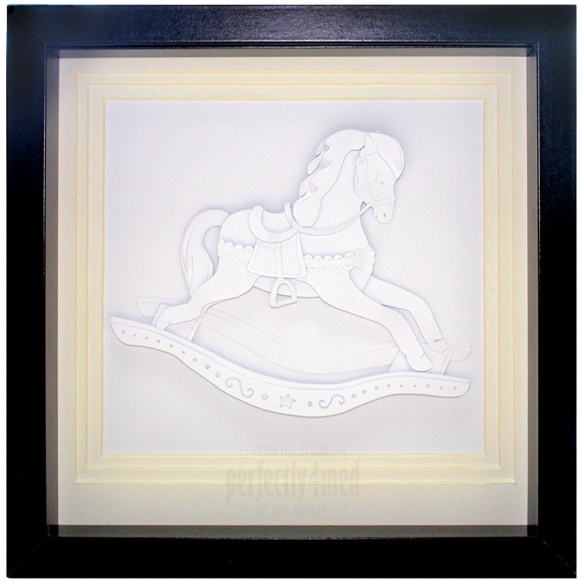
Rocking HorseIt’s ‘anything goes’ over at The Crafting Cafe this month, and the DT were given the pick of several digistamps from our sponsors The Stamping Boutique. I took on the challenge of this wonderful rocking horse image, and after some digital tracing created this layered paper (160gsm) decoupage sculpture – frame is 9″ square to give you a sense of scale. My Silhouette Cameo is certainly proving itself a useful purchase! There are no lines in sight, so the project relies on shadows to create the relief and sense of depth.

A couple of tips for you – take the glass out of the frame to take photos of your mounted project. I tried to light everything evenly, as normal for my project pics, but of course for this particular project even lighting just ruined it… Uneven light was the key. The first mount I tried was a single layer with equal padding all round – and it looked awful. So I used the picture framing practice of having a deeper section at the bottom and layered the mount as well and think it all works far better 🙂

I hope to develop the technique further and create more original layered paper art.


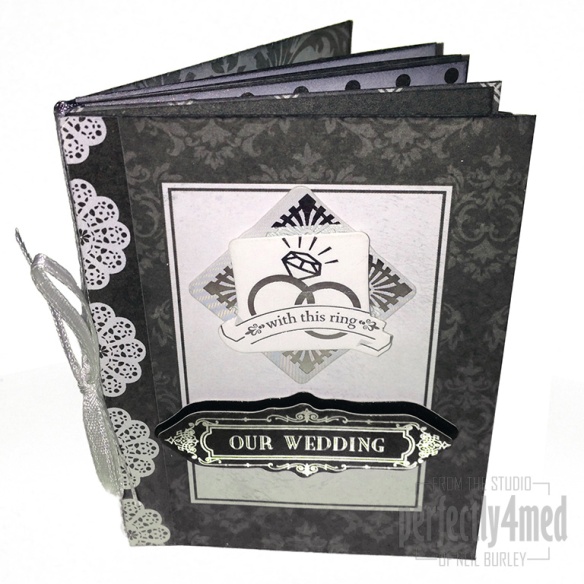
Wedding Mini-Album (for Jones Crafts)

Complete_w2Featuring more of the Bella Celebrate Paperz, this mini-album is constructed from one 12×12″ sheet, two 3×4″ project cards, a couple of 3D stickers and die cuts and lots of memories. It’s a hand bound, three signature booklet with the folio tied into the cover using ribbon. With plenty of room for journaling names, dates and recollections, this mini-album could also be included in a bigger layout. Making info follows the gallery.

Continue reading

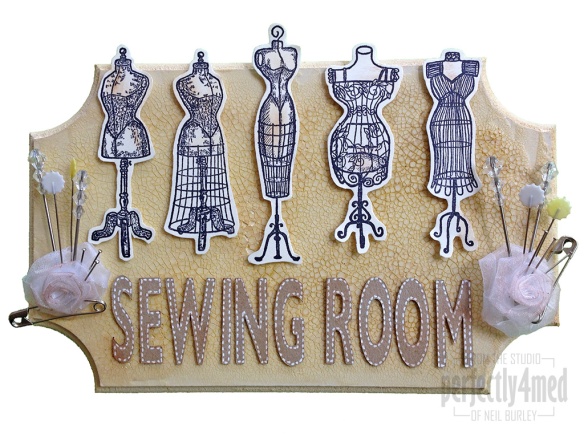
Sewing Room Door Plaque (for Creative Expressions)

Sewing Room Door PlaqueAnother of my projects featuring Creative Expressions’ Antique Dressform stamp set. This one is sporting a few embellishments that I wouldn’t consider to be my normal style, but the ribbon roses (also from CE) matched the theme perfectly and made a great pin cushion for the various pins I nicked from my quilting stash. No step-by-step photos this week, but there’s still a kit list and instructions for those that want them:

Continue reading

Art on a moving canvas

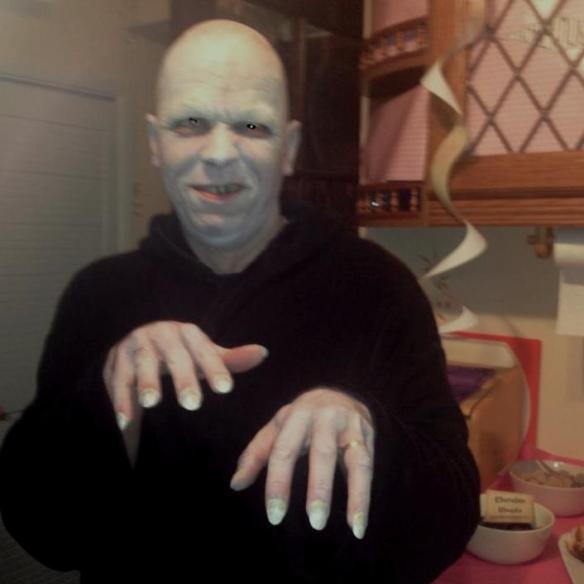
VoldemortNow I’m not entirely sure why I appear to have googly eyes in this photo… but I was the nominated driver, so it wasn’t the butterbeer! This is me, as Voldemort, at a Harry Potter fancy dress party last night. I started the makeover by using a Pritt glue stick to stick down my eyebrows – several layers, drying between each. Next was eye liner and eye shadow – doesn’t that need practice?! Then copious amounts of white face paint, with added red round eyes, and hints of green. Finally veins and general grot were added with eye liner or black face paint and a fine brush before being smudged in. And then came the fun part of trying to not itch, brush, scratch, bump or otherwise remove any of it!

The nail are artificial and though supergluing them (that was the included glue) was good for security, not so good for quick removal later… Cover with a layer of white nail polish, follow up with dabs of grey in the bottom third, and then dab green on the cuticle line. Add dry brushed brown lines for texture, smudging with a finger tip as it dries. Finally, mix a little black nail polish in a clear top coat and brush over the lot. White/green face paint over fingers and wrists to blend in, and emphasise the length of fingers using black paint in the  the webs between the tendons towards the back of the hand and blend in.

Top tip – apply your black tooth wax BEFORE you lengthen your nails.

I’ve never done any sort of make up before, and the moving canvas created particular problems – like my eyebrow covers peeling off when I was laughing…

And a handy tip – much the same make up job seems perfect to be The Emperor from Star Wars or Uncle Fester from the Addams Family. That’s the next couple of fancy dress parties sorted. I just won’t use superglue next time.

Indian-style Home Decor (for Creative Expressions)

Henna Mosaic FramedThis home decor piece uses the Mosaic and Floral Corner Singles stamps from Creative Expressions ‘Henna’ stamp range. By using watercolour paper I hope to have given the impression of the texture of rich Indian fabric, and using offset printing as well as careful cutting given dimension and interest to the piece. A frame from Ikea sets off the project a treat and allows it to stand freely or be wall mounted.

Continue reading

Cake Decorating – an edible donation cheque!

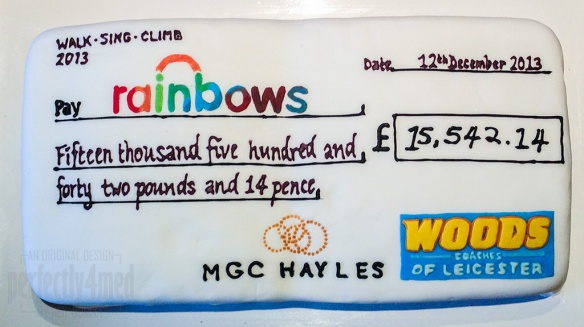
Rainbows Donation Cake

This is what I spent four and a half hours on Sunday afternoon doing – and it was handed over to Rainbows Hospice this morning, so I can now share it! The spectacular sum was raised by the staff of MGC Hayles and Woods Coaches over the year, with the Rainbows Walk in Leicester, a choir concert, the national Three Peaks Challenge and (in a after-pic addition to the icing) a business challenge task. I was commissioned to take an iced cake (twin square sponges) and turn it into the donation cheque. I mocked it all up on the computer before printing it out and transferring the design on to the fondant icing by pressing through. Then it was just the small (and patient) matter of piping and cutting. The process wasn’t helped by the icing mixes looking a muddy brown colour when mixed, but when dried, the colour theory did end up working. The finished cake is 9″x18″.


Filigree Lantern (for Creative Expressions)

More inspiration using the new Henna Singles stamps from Creative Expressions. This time, I’ve used the ‘Mandala’ stamp on card and heat-proof acetate with embossing powder to create this brass-filigree-effect hanging lantern. The middle set of panels are acetate allowing the light from a battery powered tea light to shine through. Three of the joining segments are attached with mini-brad so that the light can be accessed. Perfect for festive lighting!

Continue reading

Family Circle 1901

This is my final project as a member of the WOW! Embossing Powder Design Team. This family project published today, here, features my great great grandfather and his eight children. I’m in a black and white phase at the minute, and wondered if the whole frame looked a little funereal, but then others have said it’s quite gothic and in keeping with the end of the Victorian era. I’ll go with that 😉

Crocus Planter (for Creative Expressions)

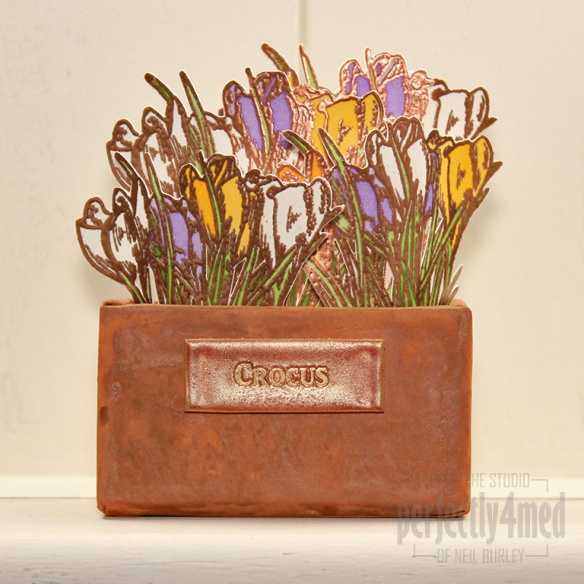
Crocus PlanterMy final project with this month’s Creative Expressions’ Winter Flower stamp set is this cute little terracotta planter resplendent with colourful crocus. Except it’s not terracotta. And you won’t need to water the crocus either. May be just a dusting now and then 😉
For making information, read on.

Continue reading