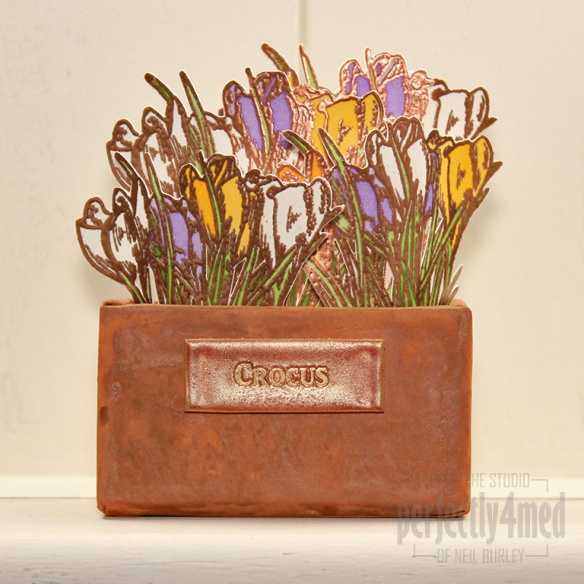
 My final project with this month’s Creative Expressions’ Winter Flower stamp set is this cute little terracotta planter resplendent with colourful crocus. Except it’s not terracotta. And you won’t need to water the crocus either. May be just a dusting now and then 😉
For making information, read on.
You will need:
Creative Expressions Winter Flower unmounted stamp set
Cosmic Shimmer Embossing Powder: Ancient Copper Metallic/Dark Bronze Lustre
Cosmic Shimmer Misting Inks: Sunflower/Purple Violet/Meadow Lime/Soft Moss
Foundations Card: Coconut White
Ranger Distress Paints: Rusty Hinge/Vintage Photo/Walnut Stain/Black Soot
Ranger Mister bottle
Ranger Perfect Medium: Clear
Tim Holtz Configurations box insert
Non stick craft sheet
- Make four clusters of crocus: print the stamp using Perfect Medium four times onto a sheet of Coconut White card, cover with Ancient Copper Metallic embossing powder, tap off the excess and heat set.
- Squirt one spray of each of the misting inks into a suitable tray and use as a watercolour paint to colour the flowers and leaves. Allow to dry and then cut out.
- Take a chunk of polystyrene and cut to fit the inside of the configurations insert – rub the top surface to get a bobbly finish that is relatively flat. Squeeze out a little of the Black Soot and a bit more of the Walnut Stain Distress Paints onto your non-stick craft sheet and use a paintbrush to apply to the top area and over the edges. Apply a layer of Walnut Stain first and then dab in areas of Black Soot. Set aside to dry.
- Undercoat the outside and over the top edge of the configurations box insert with Rusty Hinge Distress Paint and allow to dry.
- Squeeze out equal amounts of Rusty Hinge and Vintage Photo Distress Paints next to each other on the non-stick craft sheet and spritz with clean water from a mister bottle until beads start to form. Squidge the configurations box insert into the paint each side at a time – there will be blobs and marbling – this gives the weathered terracotta appearance. Dry off with a heat tool and repeat as desired to build up the effect. Dab paint onto any areas not covered using a paintbrush.Set aside to dry.
- Cut a small tag of Coconut White card for the front label and press it onto the Perfect Medium clear ink pad. Lift off and cover inked card with Dark Bronze Lustre embossing powder, tap off excess and heat set – repeat four times to build up a deep layer of embossing.
- Ink up the Crocus text stamp with gold metallic pigment ink (optional). Heat up the embossed tag until soft and then press the stamp into it, holding it steady until the embossing powder resets.
- To assemble, push the polystyrene into the trough and using a sharp knife cut slots to push the crocus bases into (as shown). It helps to hold the base of the crocuses with fine tweezers to push them in. Mount the label onto the side of the trough with foam pads.


Brilliant Neil, that pot actually looks like terracotta, I love it. Tracy x x