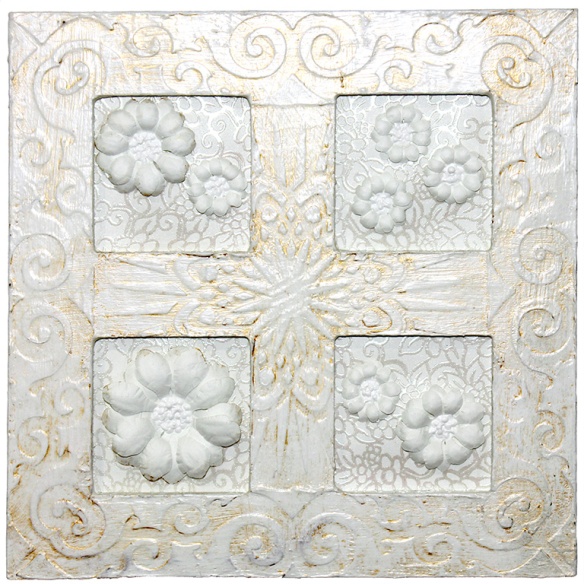
Continuing the white-on-white theme I started last week (and probably ending this week!), I’ve created this shabby chic home decor piece using the Pronty MDF Photo Frame with Four Holes, stencils, texture paste, gilding wax, stamps, embossing powders, die cuts and white PVA glue.
You will need:
Creative Expressions Floral Background A6 unmounted stamp plate
Creative Expressions A5 U-Mount sheet
Pronty MDF Photo Frame with Four Holes
Foundations A4 Card: Coconut White
Cosmic Shimmer Texture Paste: White or Clear
Cosmic Shimmer White PVA Glue
Cosmic Shimmer Specialist Acrylic Glue
Cosmic Shimmer Embossing Powder: Arctic Pearl Lustre
Cosmic Shimmer Metallic Gilding Wax: Golden Light
That Special Touch Masks: Sunburst
That Special Touch Border Mask: Swirls
Heartfelt Tattered Blossoms Die (or similar)
Ranger Distress Paint: Picket Fence
Ranger Perfect Medium ink pad: Clear
Ranger Matte Multi-medium
- Draw around the edge of the apertures with a pencil through to the back plate.
- Using just the top section, place the Sunburst mask in the centre and stick down with masking tape. Using a palette knife or similar, smooth a layer of texture paste through the mask. Remove the mask carefully and smooth the texture paste from the edges of the apertures. Allow to dry (or work very carefully round the wet paste). Always clean the mask and tools of paste straight away in clean water.
- Working on one side, centre the border mask and stick down with masking tape – I put the tape diagonally so that the corners would be mitred. Apply the paste as before. Repeat at the opposite side. Allow to dry completely before repeating on the remaining two sides. Allow to dry completely.
- Next, undercoat the textured frame with a couple of coats of white gesso or thinned acrylic paint, allowing to dry between coats. Don’t forget the inside and outside edges.
- Dab over a layer of Picket Fence Distress Paint and allow to dry. Repeat.
- Once dry, add a layer of matte multi-medium and allow to dry completely.
- Next rub over some Golden Light gilding wax using a tissue or your finger, and then rub back with a clean cloth – aim to push the wax into the crevices and off the tops of the moulding.
- For the background, cut four pieces of Coconut White card to 7.5cm square. Ink up the stamp with the Perfect Medium and print onto each square. Cover with embossing powder, tap off the excess and heat set.
- Stick down the embossed square over the pencil squares on the base sheet of MDF using the Specialist Acrylic Glue. Glue the frame onto the base with the same glue – you may need to clamp or put weights on until the glue dries.
- Die cut several flowers from the Coconut White card, and using a large ball embossing tool onto a thin sheet of foam or an old mouse pad, stretch the card to form a curved petal shape. Flip the flower over and circle round the base of the petals to make them stand up. Layer two flowers and stick together with the Specialist Acrylic Glue.
- For the flower centres, put small dots of the White PVA glue around the edge of the centre, spacing them so that they don’t touch (ideally!). Let these dry – I put mine on a radiator to speed up the process. Repeat this process several times, filling in the gaps and building up the bobbled texture. Once everything is dry, you can stick the flowers into the frame and you’re done 🙂


Absolutely gorgeous Neil, I love the texture. Tracy x
this is lovely Neil. I love anything shabby!
Wonderful Texture Neil.