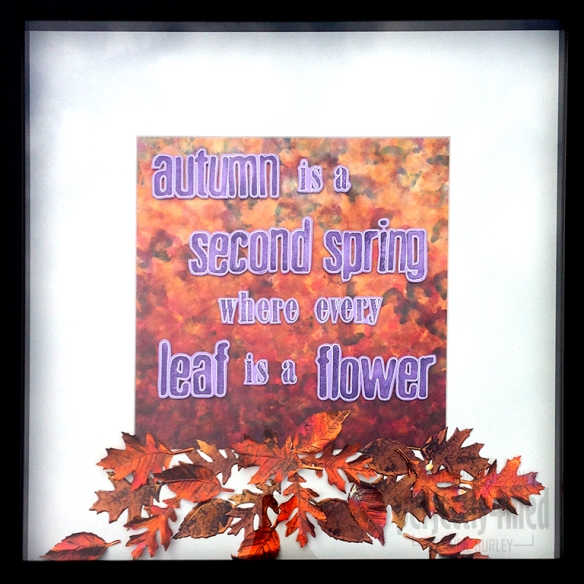
It’s officially autumn here in the UK, and on cue, the sun has disappeared, the temperature has plummeted and the rain is thrashing down! I’m having a go at getting on the Creative Expressions Design Team, and submitting a last minute entry to their design team call which closes today. As part of the application, I had to create a piece on the theme of ‘autumn’ and spent Wednesday making this piece. It’s in a 50cm square frame and features a 12×12″ alcohol inked glossy background, stamped and heat coloured embossed copper leaves and stamped and outlined lettering. For more making details, read on!
You will need:
- Ribba frame and mount (52x52cm) [Ikea]
- 12×12″ glossy card [Ranger]
- Alcohol inks and application tool: Terracotta, Butterscotch, Red Pepper, Raisin with Blending Solution [Ranger]
- Copper sheet (real copper, uncoated if possible)
- Tattered Leaves die [Tim Holtz/Sizzix] and die cutting machine
- Tattered Leaves stamp set [Tim Holtz/Stampers Anonymous]
- Archival Ink: Jet Black [Ranger]
- Distress Ink: Dusty Concord [Ranger]
- White pigment pen [Uniball Signo Broad]
- Metal embossing tools
- Coordinating Bazzill card stock
- Artist’s gum tape
- Pinflair Glue Gel or similar dimensional/decoupage glue (e.g. silicone glue)
- Heat tool, blow torch may be useful
Start by colouring the glossy card with alcohol ink. Use the darker tones at the bottom with random blots at the top of the page. Keep adding more alcohol ink to the pad in the lighter tones as you move up the page. Remember to rotate the tool as you apply the ink. Use Blending Solution to lighten the top section.
The alcohol inks dry almost instantly, so as soon as you are happy with the background, lay it face down on the rear of the mount – it will overlap by about 0.5cm each side. Use dampened artist’s gum tape to attach it.
Next, cut several leaves from the copper sheet using the Tattered Leaves die and your die cutting machine. You may find the cut leaves do not easily release from the sheet – be careful, the edges are very sharp. They should tear fairly easily along the cut lines. Keep any larger offcuts and die cut more leaves from them.
Using one of the tattered leaf stamps, ink up with jet black archival ink and print image onto the die cut leaves. You may find the stamp slides on the glossy surface if there’s too much pressure or too much ink. The stamp does not line up exactly with the die cuts, but that doesn’t matter. Heat set the ink with a short blast with the heat tool.
Now it’s time to emboss the leaves – work on a couple of sheets of card to press into. Use the fine point tool to outline some of the veins – very little of the inked image will move if you have teflon tips. Turn over the leaf and run the wide tip down the veins to puff them out. Turn leaf back over and smooth the areas between veins with the flat edge tool.
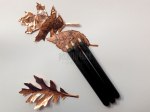
The leaves can now be heat coloured (top row) – as copper heats up it oxidises in the air and goes from lighter yellows through to oranges, reds and eventually black and silver. Place the leaves on a wire rack and heat with the heat tool, which will need to be quite close, until colour develops. A blow torch works quicker, but the colour change is rapid, so work carefully. Take care not to set anything on fire!
While the leaves cool, stamp your wording onto card stock in Dusty Concord distress ink and then outline with the white pigment pen to provide a bit of contrast. Fussy cut around the words leaving a small border.
All that’s left to do is decide on the layout – this photo shows one of the potential layouts I decided against. I placed some of the leaves to over lap the edge of the mount so that they curled at the bottom of the recessed frame. Use the glue to stick everything down, layering and holding the items off the page by using a deeper blob of glue. You could use foam pads to do the same, but these may not be reliable, particularly with the metal leaves. Once the glue is set, reassemble the frame (make sure you’ve cleaned the glass!) and enjoy your autumnal project.


Lovely Neil, your work is really good, I love doing your technique classes as they are always full of ideas. Good Luck to you love Jackie
Great project Neil. I love the colour of autumn leaves. What a great way to capture those colours. Very clear instruction too, thank you.
Neil, love this gorgeous piece, Thank you for sharing your process and inspiration with an awesome tutorial.
Hi Neil, Love the fall colors and those leaves are stunning. Your work is always top notch.
I love the added inking on the leaves to give the texture and the colours on the leaves are great too. 😀 Thanks for the tutorial. 🙂
Fabulous project… skilled and talented… you cannot fail!
Eileen x
Great project Neil! Love those leaves! Keeping my fingers crossed for you 🙂
Clear and lucid tutorial, well laid out to make it easy for anyone to copy any part of this project. Thanks from Val
Fab tutorial as ever Neil, love the project, autumn leaves are always a favourite theme of mine xx
Gorgeous project Neil. Love the leaves technique. Many thanks for sharing & the very clear instructions. Kay x
What a great project! It looks great and the instructions are clear and look easy to follow, with useful hints and techniques included!
fab project, detailed info without any technical stuff, easy to follow and plenty of inspiration, good luck
Neil you never fail to amaze me with you outstanding talent. As always you deliver. Great tutorial my friend.
Another fantastic project you have shared with us. Can’t wait to try this one 🙂
WOW! The photograph does not do this wonderful piece of art justice! The beautiful sheen and texture on the leaves is absolutely beautiful, so realistic and captures Autumn so well. Being a novice, I checked out the instructions and I am sure I could attempt this. The various stages are easy to understand-Thank you Neil 🙂
I love the effect on the leaves, they are so rich and really glow with that Autumnal feel. Great work Neil.