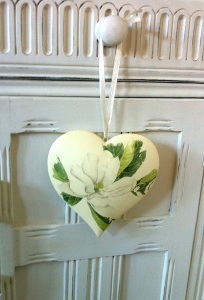
 This started out as a cream coloured ceramic heart from Dunelm and has had the magnolia image transferred onto it. The image comes from spare wallpaper used to decorate the room – an ideal way of making complimentary accessories.
Technique:
- Cut out the image you wish to transfer: this can be a colour laser copy, or if using wallpaper, I am guess you need a spongeable vinyl as this is the layer we’re hoping to stick down. [NB: text needs to be reversed on your print out for this technique]
- Brush a thin layer of matte multi-medium (e.g. Claudine Hellmuth’s STUDIO range from Ranger) over the area you wish to transfer the image to.
- Place the image face down onto the prepared surface and burnish with a bone folder or brayer – you need to make sure the whole image is in contact with the surface (unless you particularly want missing bits for distressed grunge look).
- Leave to dry completely. If you don’t, you run increased risk of the image lifting off soft multi-medium, particularly if you are applying it to a non-porous surface.
- Wet the paper surface and allow to soak a little before starting to rub it with your finger. You are aiming to rough up the surface and then start peeling it off the image/multi-medium layer.
- Gently work over the image wetting and rubbing. Once you get a clear view of the image, stop, let it dry. Any remaining paper will show up more clearly, and allow you to wet and rub in particular areas rather than rubbing off the image. Take your time at this stage, as too much rubbing starts damaging the image.
- Allow to dry, and then seal with a layer or two of multi-medium.
TOP TIPS:
- Wipe up any wet multi-medium that squeezes out from under the paper and don’t let it get on the back of the paper as this stops the wetting process later on
- The wallpaper backing seems to come off in one layer once you get down to the image, don’t work it too hard though as the image layer is very fragile
- A stiff paint brush can help flick off the peelings without doing too much damage to the image transfer
- Any small bobbles can gently be removed, ONCE DRY, using very fine grade sandpaper – but you do run the risk of erasing areas of your image, so a light touch is essential
- Practice on a similar surface if you accessory must not be ruined. Or buy an inexpensive accessory!
It’s a well documented technique, but I’ve not yet seen anyone mention it can be done with vinyl wallpaper designs. Another perfectly4med first?
Neil, I want to thank you for taking the time to write a wallpaper tutorial. After the idea of wallpaper image transferring came to mind, I searched for confirmation that it was a feasible creative option but have been unable to come across a single mention of this until I found your post. Just what the doctor ordered!