Creative Chemistry 101 – Day 9

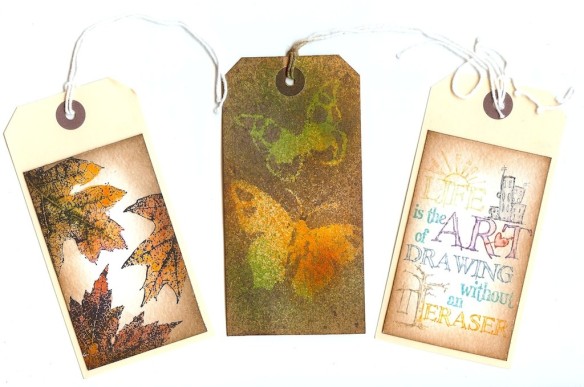
So we reach the penultimate teaching day of the fabulous Creative Chemistry, and Professor Tim is working his alchemy with Distress Inks and Perfect Pearls. I’m used to using Perfect Pearls in my own misting mixtures and love the effect of the Blue Patina mixed with Spiced Marmalade – a really nice faux rust finish. Mixing it up even more with the wrinkle free distress technique has resulted in a textural happy accident!

Creative Chemistry 101 – Day 8

Today we looked at a ‘Paint Primer’ – and I discovered a number of Snow Cap dabbers that were solid… and I only have the Rock Candy (clear) Crackle Distress paint. But I persevered and here are my homework tags:

I’m not sure about the acrylic resist on canvas in the centre – it really didn’t work out well, and I suspect I need more contrast on the background to make the yellow and pink dots stand out more. The Shattered Stains technique though is going to  become a favourite!

Creative Chemistry 101 – Day 6

At first I thought I’d have to skip Day 6 – Distress Markers – as I haven’t yet received my order I put in using my birthday funds. But then I remembered I had three pens from a workshop with the Professor himself back in February! Here’s two of the technique tags:

 I used the coated card stock I usually use for ProMarkers in place of the speciality stamping paper, and though I can’t directly compare, from the description given during class, it seems to do the same thing. It’s the Ryman Bright White Coated Card 200gsm.

Creative Chemistry 101 – Day 7

There… I’ve just finished catching up with my CC101 homework and done the tags for today, Day 7 – embossing powders. The first tag uses clear embossing powder over  multicolour distress ink stamped images as a faux batik effect – it resists the layers of distress over the top. Second tag shows my favourite technique – faux rusted enamel. And finally using distress embossing powder as a resist – I love the matte finish.

Creative Chemistry 101 – Day 5

I’m still catching up with my CC101 homework – today I’m publishing Day 5 on Day 7 🙂

Day 5 was all about playing with Distress Stains – the first tag showing their effects on kraft resist with distress inks over and stamped with jet black archival ink. The second builds up the colours on a wet tag with distress stains before drying off and overprinting with Picket Fence Distress Stain applied to a stamp and dried off quickly before overstamping with archival black. Finally is my attempt (the first one) at doing the distress stain marbling using the Picket Fence Distress Stain – it turned out ok, but I think I’ll have to try different colours and surfaces to get a more marbled effect.

Creative Chemistry 101 – Day 4

It was Creative Chemistry 101 Day 4 – but I was a bit busy, so I’ve caught up on Day 6, and that’s only because I don’t have my hands on any Distress Markers yet! So back to Day 4, and we were exploring Distress Reinkers, using them as watercolours, sprays and for inking up custom stamp pads. The autumn leaves work really well as watercolours and the reinkers blend wonderfully. The sprays didn’t work quite so well, and there’s a bit of Perfect Pearl in there from previous mixes which might not have helped. By the way, Heidi Swapp masks are not heat proof… And finally the custom ink pad was easy to make, but I found I had to work fast to get ink on before the previous colour had oozed its way across! I stamped the image and then pulled some of the colour from the lines to fill in the white areas. All of the tags have been distressed with trusty Vintage Photo DI round the edge.

Creative Chemistry 101 – Day 3

It’s Creative Chemistry 101 Day Three and we’ve learnt about the properties of oil-based Archival Ink from Ranger. I only have black at the moment… which makes some of the homework a bit tricky. Tag one is the alcohol ink agate background with images stamped in Archival Ink, tag two is the Archival Resist on glossy paper (only I substituted Adirondack pigment inks, which of course are water based and not going to do the same), and tag three is the Reflections Stamping onto embossing folder – only I don’t have the Reflections stamps, but I practiced the principle! Not my best work as I’m rushing to get done in time to go set up at the NEC and got them done in 40 mins 🙂


Creative Chemistry 101 – Day 2

I’ve enrolled on another course – this one is online and is a 10-day delve into the world of Ranger inks and other products lead by none other than ‘Professor’ Tim Holtz. Creative Chemistry 101 Day One introduced us to the various types of ink and their properties. Day Two was exploring distress inks, and for me was a revision of blending and spritzing, watercolour stamping and wrinkle free distress. Here’s my homework tags:

More butterflies – and the odd moth

I’ve had a creative day today – and this is one of the results. I’ve used the new Attic Treasures stamp from Tim Holtz, masking tape, Promarkers and a Letrajet attachment, a bit of Letraset metallic tape and a few stick on pearls. I’ve kept it clean and simple to enter the ‘Less is More’ masking challenge this week, and the colour scheme fits the ‘Passion for Promarkers’ yellow and pearls challenge. Oh, and me being me, I looked up each of the winged things on the interweb to find out what colours they should be…

I’m thrilled to be showcased over on the Less is More blog for this card – what an honour to be the first LIMister!