Brusho Paint Crystals are go!

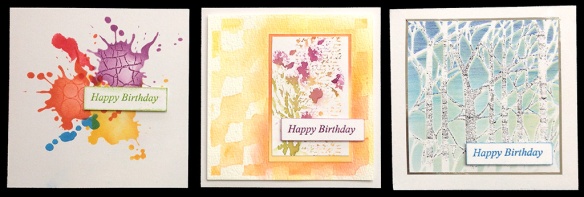
Ever since I came across the name ‘Brusho’ and saw what Eileen Goodwin had done with them, I just had to have a play! For the unfamiliar, Brusho paints are water-soluble crystals of glorious colour which can be sprinkled onto a wet surface, or scattered dry and then spritzed, or indeed just mixed with water to make a watercolour paint. These are three cards I made this evening, on my first journey with the starter kit. The quotes are courtesy of Tim Holtz/Stampers Anonymous. For the first two, I stamped over and embossed with white embossing powder. For the last, I tried the faux batik approach, which I was less happy with, in part due to the wrinkled watercolour paper I was using – but that sort of goes with the sentiment of the card! And I love the effect, definitely on my to-play-with-more list!

‘Made In The Image Of God’ Mirror

Made In the Image

I’ve been using the tarmac technique again today, again on a trusty Ikea mirror. This time, I’ve used my Silhouette Cameo to cut shapes and letters from 300gsm card which I’ve stuck down directly to the frame. I kept the waste to use as a stencil later to layer the colours. Both colours are metallic, and much more iridescent in reality than in the picture. Careful masking with the waste layer and touching up with a brush allowed the lettering to be picked out against the main colour. I put an Art Deco style border around the mirror itself just to pick it out a bit more – of course, the viewer will be framed nicely. Add a bit of bitumen, rub back, and the piece is done.

Available to purchase (or order), £25, p&p extra. Please email with your requirements.


Love is… tarmacing

Love WordIt’s a lurve theme over at The Crafting Cafe this month, and the DT got to work with digistamps from the fabulous Bugaboo Stamps. Ava and Deacon’s Love Word was perfect inspiration for this 12×12″ canvas board layout. I coloured the image with ProMarkers and the board with acrylic paints and added my new favourite tarmac technique. For a bit more detail, see my post at The Crafting Cafe.


A bit of me time… tarmacing a frame!

Tarmaced MirrorI had some ‘me’ time today in between looking after pups, getting ready for tonight’s class and breathing a sigh of relief at meeting another Craftwork Cards sample deadline! I’ve been keen to try out the tarmac technique since coming across it on Karen Clare’s fabulous blog and seeing the stunning results of various Facebook friends who have been to her workshops. It’s amazing how an Ikea mirror, pet food cartons, a bit of acrylic paint and a solid block of tar can be transformed! Unfortunately the photo doesn’t pick up the gleam of the gold metallic paint and Inca Gold which set off the bitumen layer a treat. Definitely a project to be repeated and developed. Loved it!


Sewing Room Assemblage (for Creative Expressions)

Sewing Room AssemblageI’m glad there’s five Wednesdays in January this year, as it’s given me more time to work on my final project for Creative Expressions using this month’s featured Antique Dressforms stamp set. This sewing room assemblage was fun to put together and features many of my favourite techniques as well as some innovative uses for some of the other CE products. A room-by-room guide follows and a printable worksheet is here. The complete assemblage is available to purchase – contact me for details.

Continue reading

Layered-Paper Rocking Horse

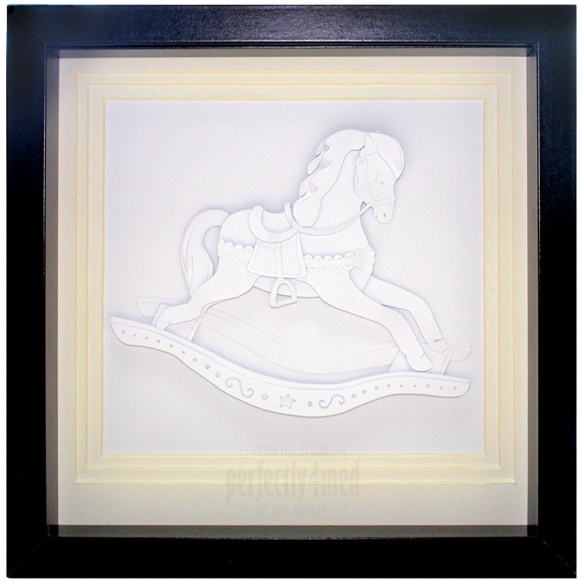
Rocking HorseIt’s ‘anything goes’ over at The Crafting Cafe this month, and the DT were given the pick of several digistamps from our sponsors The Stamping Boutique. I took on the challenge of this wonderful rocking horse image, and after some digital tracing created this layered paper (160gsm) decoupage sculpture – frame is 9″ square to give you a sense of scale. My Silhouette Cameo is certainly proving itself a useful purchase! There are no lines in sight, so the project relies on shadows to create the relief and sense of depth.

A couple of tips for you – take the glass out of the frame to take photos of your mounted project. I tried to light everything evenly, as normal for my project pics, but of course for this particular project even lighting just ruined it… Uneven light was the key. The first mount I tried was a single layer with equal padding all round – and it looked awful. So I used the picture framing practice of having a deeper section at the bottom and layered the mount as well and think it all works far better 🙂

I hope to develop the technique further and create more original layered paper art.


Stencilled – Day Two

Stencilled - Day TwoDay Two of my online class ‘Stenciled’ – guess it’s American… Three more techniques suitable for all stencils. Todays are Tim Holtz’s Splatter, That Special Touch Distressed Checkers and Dreamweaver Trees Silhouette. And todays techniques included stamping, watercolour and coloured pencils.

And todays most important learning point – always mask areas outside the stencil as it’s amazing how far the back edge of a distress ink applicator tool can actually reach…


Stencilled – Day One

I’m doing another Online Card Class – this time reviewing the different ways of using stencils. None of it is rocket science for me so far, but it’s always good to see what others are doing and to share creative tips, tricks and which mediums work with which.STENCILED LOGO IMG_4258_wThese four cards are my take on Day One tutorials – using a stencil as a patterned background, spritzing though, using for emboss resist techniques and layering with colour. I think all the stencils above are from The Crafters Workshop and are the 6×6″ variety. The cards are 12x12cm. The black text has been cut out as a bespoke design on the Silhouette Cameo.


Wedding Mini-Album (for Jones Crafts)

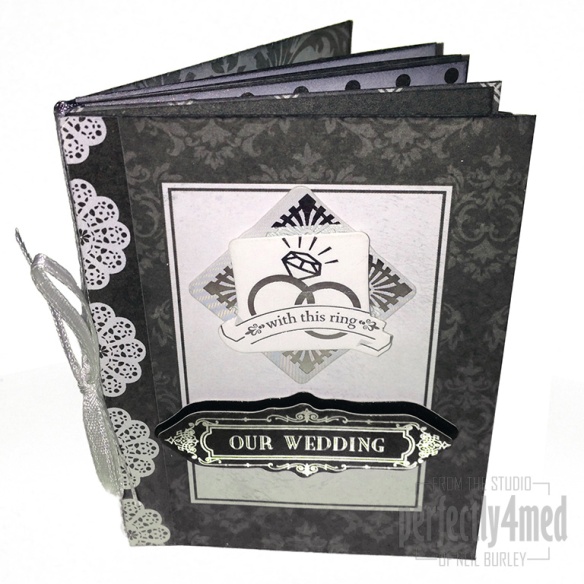
Complete_w2Featuring more of the Bella Celebrate Paperz, this mini-album is constructed from one 12×12″ sheet, two 3×4″ project cards, a couple of 3D stickers and die cuts and lots of memories. It’s a hand bound, three signature booklet with the folio tied into the cover using ribbon. With plenty of room for journaling names, dates and recollections, this mini-album could also be included in a bigger layout. Making info follows the gallery.

Continue reading

Sewing Room Door Plaque (for Creative Expressions)

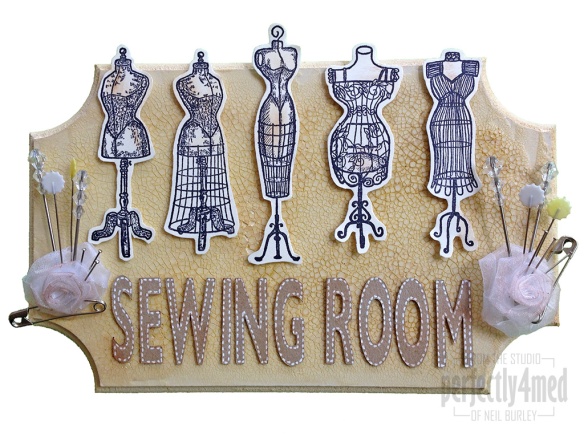
Sewing Room Door PlaqueAnother of my projects featuring Creative Expressions’ Antique Dressform stamp set. This one is sporting a few embellishments that I wouldn’t consider to be my normal style, but the ribbon roses (also from CE) matched the theme perfectly and made a great pin cushion for the various pins I nicked from my quilting stash. No step-by-step photos this week, but there’s still a kit list and instructions for those that want them:

Continue reading