Spring { petals }

It’s Lucky Dip time over at the ‘Less is More’ challenge, and this time they have set a colour theme based on one of the fabulous Design Seeds schemes:

I decided to make my card with ProMarkers again this time, and picked the closest matches in colour: Cool Grey 2, Grey Green, Meadow Green, Blossom and Rose Pink. Here are three cards that I stamped and coloured using the set colour scheme:

Creative Chemistry 101 – Day 10

It’s a sad day – the last of the lessons at Creative Chemistry. Only the bloopers video to go tomorrow and a few more days on the forums and we say a fond farewell to the Professor. I have a feeling he’ll be back though! It’s been a cracking class and thoroughly enjoyable, although however it’s dressed up, just having a one tag finale was a bit of a damp squib! And the Rock Candy Distress Stickles doesn’t even show up very well on the scan 🙁

The notes on sealing and protecting your work were brilliant though. And if you’re going to be applying Distress Stickles across whole cards or tags, they’d better bring out a bigger pot!

Creative Chemistry 101 – Day 9

So we reach the penultimate teaching day of the fabulous Creative Chemistry, and Professor Tim is working his alchemy with Distress Inks and Perfect Pearls. I’m used to using Perfect Pearls in my own misting mixtures and love the effect of the Blue Patina mixed with Spiced Marmalade – a really nice faux rust finish. Mixing it up even more with the wrinkle free distress technique has resulted in a textural happy accident!

Creative Chemistry 101 – Day 8

Today we looked at a ‘Paint Primer’ – and I discovered a number of Snow Cap dabbers that were solid… and I only have the Rock Candy (clear) Crackle Distress paint. But I persevered and here are my homework tags:

I’m not sure about the acrylic resist on canvas in the centre – it really didn’t work out well, and I suspect I need more contrast on the background to make the yellow and pink dots stand out more. The Shattered Stains technique though is going to  become a favourite!

Creative Chemistry 101 – Day 6

At first I thought I’d have to skip Day 6 – Distress Markers – as I haven’t yet received my order I put in using my birthday funds. But then I remembered I had three pens from a workshop with the Professor himself back in February! Here’s two of the technique tags:

 I used the coated card stock I usually use for ProMarkers in place of the speciality stamping paper, and though I can’t directly compare, from the description given during class, it seems to do the same thing. It’s the Ryman Bright White Coated Card 200gsm.

Less Is More: Take Three Challenges

It’s been tricky to find five minutes this week to sit down and do the ‘Less Is More’ challenge card – but I managed to get it done just before the closing time this evening. The theme this week is ‘take three challenges’ and my card fulfils these three past rules:

  • Week 4: Three Squares
  • Week 20: Monogram
  • Week 31: Metallic

Of course, the observant will note there are four squares… I didn’t notice I’d used a square card until it was all done and put together! Hope that doesn’t count toward the total number… The monogram was an accidental discovery – I triple embossed in WOW! Metallic Silver Ultra High and stamped my signature monogram into it. I then tried to catch the raised parts with Ranger Archival Jet Black ink, but missed, so carried on. Rubbing it back has produced this fabulous gunmetal finish. And I’d forgotten how tricky it was to photograph metallic surfaces!

Creative Chemistry 101 – Day 7

There… I’ve just finished catching up with my CC101 homework and done the tags for today, Day 7 – embossing powders. The first tag uses clear embossing powder over  multicolour distress ink stamped images as a faux batik effect – it resists the layers of distress over the top. Second tag shows my favourite technique – faux rusted enamel. And finally using distress embossing powder as a resist – I love the matte finish.

Creative Chemistry 101 – Day 5

I’m still catching up with my CC101 homework – today I’m publishing Day 5 on Day 7 🙂

Day 5 was all about playing with Distress Stains – the first tag showing their effects on kraft resist with distress inks over and stamped with jet black archival ink. The second builds up the colours on a wet tag with distress stains before drying off and overprinting with Picket Fence Distress Stain applied to a stamp and dried off quickly before overstamping with archival black. Finally is my attempt (the first one) at doing the distress stain marbling using the Picket Fence Distress Stain – it turned out ok, but I think I’ll have to try different colours and surfaces to get a more marbled effect.

Creative Chemistry 101 – Day 4

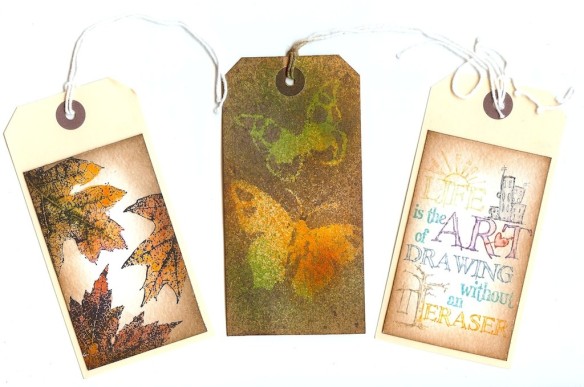
It was Creative Chemistry 101 Day 4 – but I was a bit busy, so I’ve caught up on Day 6, and that’s only because I don’t have my hands on any Distress Markers yet! So back to Day 4, and we were exploring Distress Reinkers, using them as watercolours, sprays and for inking up custom stamp pads. The autumn leaves work really well as watercolours and the reinkers blend wonderfully. The sprays didn’t work quite so well, and there’s a bit of Perfect Pearl in there from previous mixes which might not have helped. By the way, Heidi Swapp masks are not heat proof… And finally the custom ink pad was easy to make, but I found I had to work fast to get ink on before the previous colour had oozed its way across! I stamped the image and then pulled some of the colour from the lines to fill in the white areas. All of the tags have been distressed with trusty Vintage Photo DI round the edge.

WOW! with a bit of Creative Chemistry 101

I’m up early, all excited about my stint at Hobbycrafts at the NEC, Birmingham today and tomorrow on the WOW! Embossing Powders stand. They have just brought out some silicone moulds – come and see the jewellery pieces I’ve made (I’ll pop them on here next week when I have a moment). Also created last night using their new embossed resist card with inspiration from the Creative Chemistry 101 Day Five teaching on Distress Stains comes this little (8x20in) sampler for the show: