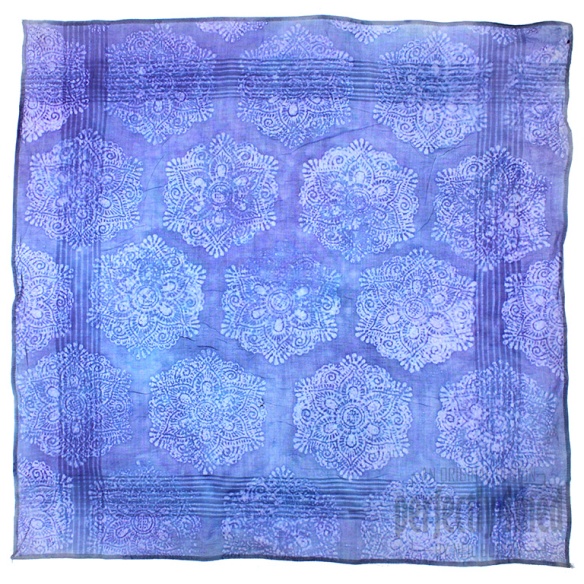
 When I saw the contents of the latest DT goodie bag lots of ideas sprang to mind. We’ve been sent the newest set of ‘Henna’ inspired Creative Expressions ‘Singles’ stamps – rubber stamps that are pre-mounted and cut ready for slapping onto your acrylic blocks and printing with straight away. This project uses embossing powder and spray dyes to create a faux batik effect on a handkerchief – although any cotton fabric would work just as well. For more making details, read on 🙂
You will need:
Creative Expressions Singles rubber stamp: Henna Mandala
Cosmic Shimmer Ultra Thick Embossing Crystals: Clear
That Special Touch: Crackle Mask
Ranger Perfect Medium: Clear
Ranger Tim Holtz Adirondack Color Wash: Denim/Sailboat Blue/Purple Twilight
Ranger Mini Mister bottle (filled with water)
White cotton fabric (e.g. handkerchief)
- If you are using a new handkerchief/fabric, you need to wash and rinse it (without using fabric softener) to remove any starch/stiffeners before dyeing. Ensure the fabric is completely dry before moving on.
- Ink up the stamp with Perfect Medium and print onto the fabric. Cover with clear Cosmic Shimmer Ultra Thick Embossing Crystals. Roll the powder over the printed area several times by lifting the corners of the fabric in turn before tipping off the excess and then giving the fabric a quick shake. If you find that the crystals are clinging to other places, you can use an antistatic bag between applications.
- You may find it easier to heat set after each printing so that you can see where you’ve done, but you can do several at a time as well. Heat until the powder sinks into the fabric and turns it translucent – it must soak through otherwise the dye will be able to seep underneath. Completely cover the fabric with the design.
- Working in a suitably protected area (I use a cardboard box) place the mask onto the fabric and spritz through with the Sailboat Blue Color Wash dye – this should start binding and add layers to the eventual outcome. Ideally it should be heat set before the next layer, but we cannot do this as it would remove the embossing powder.
- Next, add more colours over the top – I used a mix of Denim and Purple Twilight. Spritz with water to allow all the uncovered fabric to colour up. I also spritzed water into my palm and flicked it onto the fabric for larger areas of diluted colour to simulate the batik dye effect. Sprinkle large crystal salt (e.g. sea salt for grinders) over the wet fabric and leave to dry naturally (this pulls the dye and concentrates the colours around the salt).
- Once dry, it’s time to remove some of the excess dye – rinse the fabric several times in COLD water. If you want to remove even more, rinse in warm or hot water. The colour will be coming off the embossed areas, and between the fibres.
- Next, remove as much embossing powder as you can by ironing the fabric between two sheets of absorbent paper (often called newsprint, kitchen roll will work too). Set the iron to highest setting, no steam, and hold it in place until the powder wicks into the paper. Keep changing the paper until no more seeps out.
- Now the dye is fully heat set you can do one final rinse, dry and iron to complete the project. You might use the fabric to mount on a card, make a cushion cover or join several together to make a quilt. The residual embossing powder might make it a little uncomfortable to use as a handkerchief!


Great tutorial and gorgeous project!
Fabulous technique, the stamp works beautifully for this technique, love it. Tracy x
Gorgeous inkyness, have recently started to play with fabrics and been wondering if I can heat emboss onto them, I have been stamping, so thanks for showing how and this gorgeous project x