
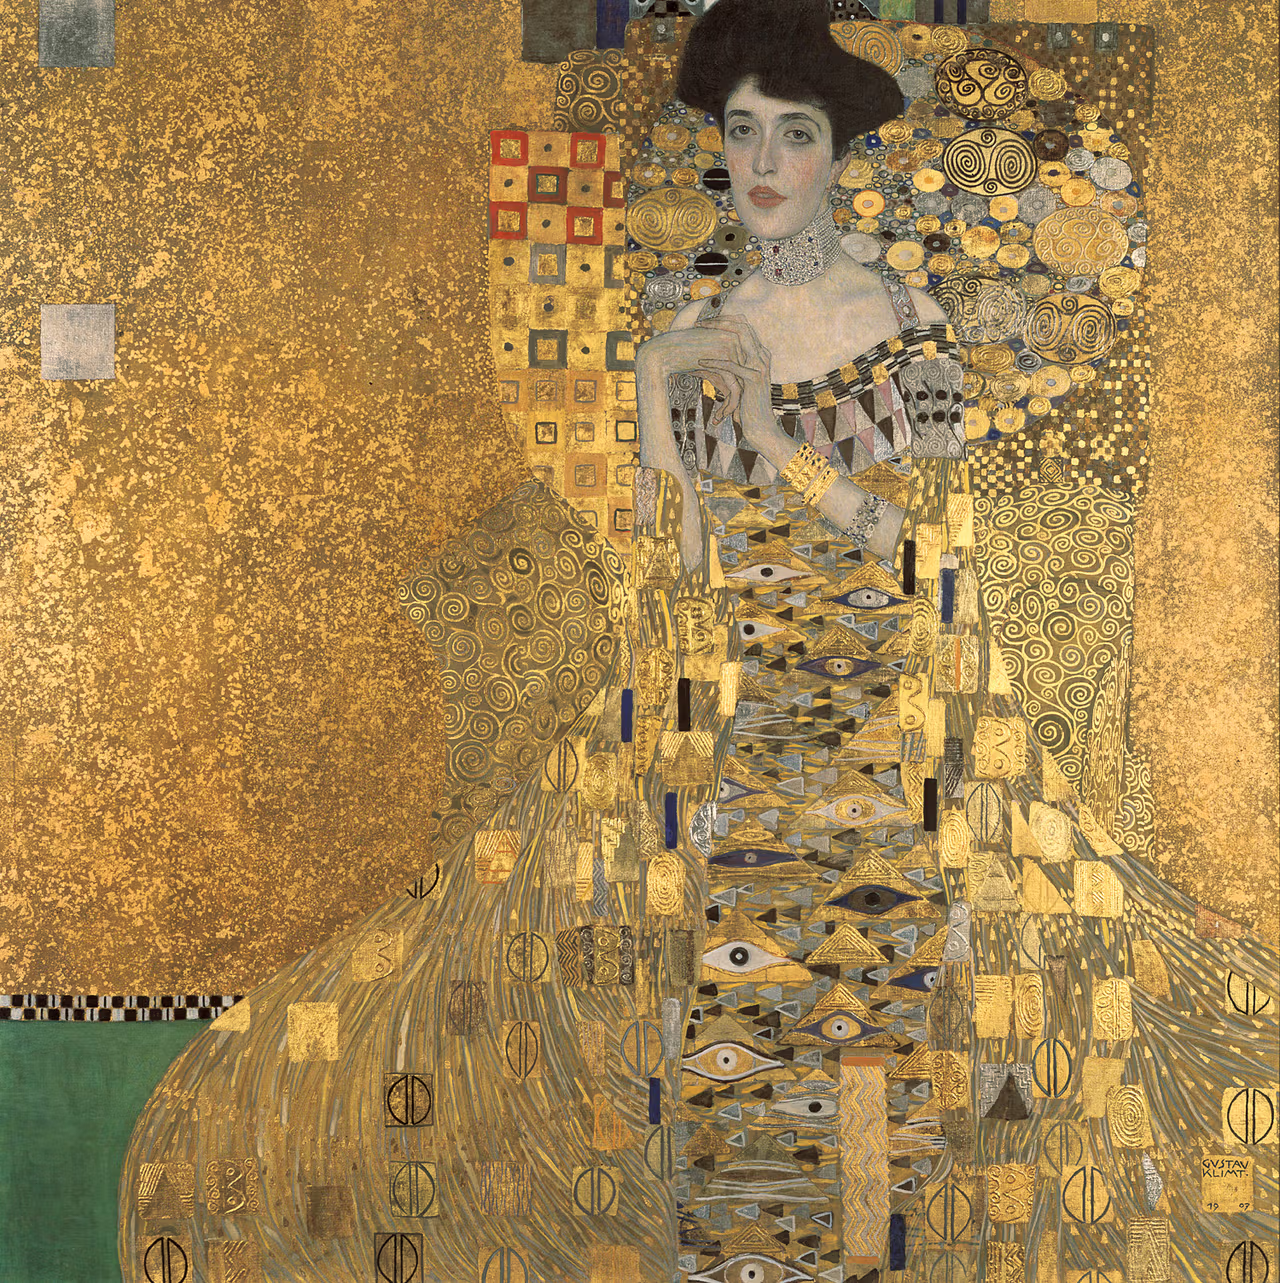
It’s going to be a two-parter… We’re underway for this month’s art journaling session in The Studio, taking Klimt’s ‘Portrait of Adele Bloch-Bauer I’ as our inspiration. When I was putting the sample together, I quickly realised my ambitions for the class were not going to fit the time available so texts went out and my first two-session layout was agreed. My Klimt inspired art journaling layout looks like this:

The inspiration
Most of the steps in a step-by-step walk through

After some experiments, I found out that I would need a sealed page for the bonding powder (see later) to work well. Handily, I had some gold gesso to hand, but gold acrylic paint would work ok too. A clear gesso layer over the top of gold metallic paint will help later on. And it matches our artist’s inspiration.
- Daniel Smith Acrylic Gesso: Iridescent Gold

I cut out the model from a Next catalogue from 2014, and bits of scrapbook paper from my stash. For ease of application, I ran them through my Xyron permanent sticker maker and then applied them to the dry page.

Next, I added the acrylic paint colour contrast.
- DecoArt Americana acrylic paint: Peacock Teal

Now it’s time for adding foils. Start by drawing block with 2-way glue. Let them dry (the glue becomes clear and tacky) and then go over the same areas with a second layer. I found that to be more reliable when sticking down the foil. Lay the foils across the tacky glue, colour side up, press firmly and then rip off to leave the foil.

For the background elements, use several shades of colouring pencils (greys and whites) to create flowing lines. Emphasising contours will add flow and form to the shapes.
If you find your pencils slipping across the paint, you’ll see why the gesso element is important (it adds tooth).
- Faber-Castell Polychoromos colour pencils

We’ve reached the midway point. In a missed out step, you can see foiled doodles and swirls – these were made with a ballpoint 2-way glue pen.

Going back to the artist inspiration, I wanted to add a bit of interest to the blank area of the left side of the layout. I masked off the paper elements and spritzed glimmer through a stencil. Whilst the spray is wet, any overspray can be wiped off painted areas using a damp baby wipe. Dry before moving on. It’s a subtle effect, but does add a little jush.
- Ranger / Tim Holtz Distress Spritz: Fossilised Amber

Glimmer and metallic iridescence don’t photograph well, but I did my best…
You’ll also see that I have added lots of marks using paint pens to reflect the artist’s.

I discovered the ease of adding an even wash for shading using Vallejo Model Wash when adding colour to a model car. I’ve also used it to airbrush shading onto laser cut painted elements. It’s ideal for this, adding an even shading across the body of the model. Apply undiluted, spread out using the brush and dab off any overly applied areas with a damp piece of paper towel.

I didn’t want to smudge anything (particularly the spritzed area) or block nibs with uncoiled glue. So, I sealed the layout with some spray varnish. I went for gloss, but wonder if matte would have been better.
- DecoArt Americana spray sealer/finisher

Final touches…
Stamped foiled dots: use embossing ink to stamp the dots onto the page and cover with bonding powder. Melt the bonding powder with a heat tool – it will go clear and will feel slightly tacky. Whilst still hot, press the foil onto it. Allow to cool, then rip off the foil.
Add more swirls and marks with Stickles glitter glue and Liquid Pearls.
- Magenta self-cling rubber stamp C41060-I
- Versamark ink pad
- WOW! Bonding Powder
- Ranger Stickles: Golden Rod
- Ranger Liquid Pearls: Gold
Watch it in super-speed
In just five minutes you can see what took three hours to make and three hours to edit and put together! Please leave a comment if you find it helpful.
The obligatory plug…
If you’d like to join us for the monthly Art Journaling Session, all the details you need are here. Book your place today! In August, the theme is ‘fused’ and as usual, we will be working mixed media magic in our journals.