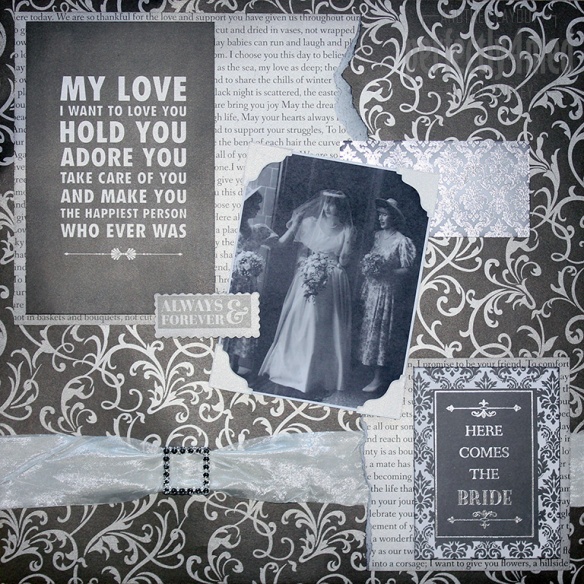
 It’s been quite a while since I did a 12×12″ scrapbook layout… but my recent receipt of the DT goodie box from Jones Crafts has inspired this layout featuring the Bella Celebrate Paperz collection. This is the first of many DT projects in the run up to the Stitches trade show for Jones Crafts. It includes several designs of double sided pearlised 12×12″ sheets, die cut collections, 3×4″ and 2×4″ foiled project cards as well as coordinating organza flower brads and 3D stickers. Read on for making information…
You will need:
Bella Celebrate Paperz: Flourish / Classic / Cut Outs
Bella Foiled Project Cards 3×4″: for weddings (WPC23)
Bella Foiled Project Cards 2×4″: for weddings (WPC16)
Bella Die Cut Pack: for weddings (BW48)
Ranger Distress Inkpad: Black Soot
Ranger Liquid Pearls: Black Onyx
Satin ribbon
Buckle (Jones)
- Trim off the label on the Flourish sheet and distress the edges using the Black Soot distress ink on a foam applicator.
- Cut out the large sentiment from the Cut Out sheet and distress the edges.
- Cut a strip from the Classic sheet, and using the reverse, distress the edges and tear towards you to get the white torn edge. Attach the large sentiment with foam pads.
- Similarly, tear out the Here Come the Bride sentiment card from the 3×4″ project cards pack, run Black Soot round the edges and mount on more of the Classic sheet using foam pads.
- Thread the ribbon through the buckle and stick across the bottom of the Flourish sheet using double sided tape. Add both mounted sentiments, sticking down with double sided tape.
- Distress the edges of the brocade card from the 2×4″ project card pack and stick down to the main sheet.
- Mount your photograph on foam pads and stick down at a jaunty angle, and glue on the photo mounts from the die cuts pack.
- Distress the edges of the Always & Forever sentiment and mount on foam pads.
- Finally, add small drops of Liquid Pearls into the wells of the buckle face and allow to dry.
