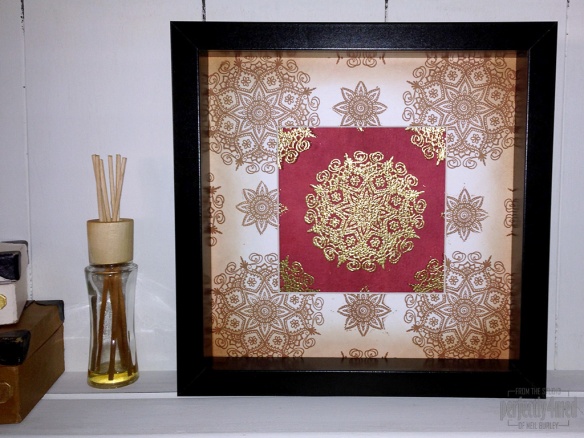
 This home decor piece uses the Mosaic and Floral Corner Singles stamps from Creative Expressions ‘Henna’ stamp range. By using watercolour paper I hope to have given the impression of the texture of rich Indian fabric, and using offset printing as well as careful cutting given dimension and interest to the piece. A frame from Ikea sets off the project a treat and allows it to stand freely or be wall mounted.
You will need:
Creative Expressions Singles Stamps: Henna Mosaic & Henna Floral Corner
Cosmic Shimmer Acrylic Misting Inks: Warm Hue Set (Sunflower, Marigold & Scarlet Flame)
Ranger Mister Bottle (fill with clean water)
Cosmic Shimmer Embossing Powder: Bright Gold Metallic
Ranger Perfect Medium: Clear
Ranger Archival Ink: Sepia
You will also need good quality watercolour paper and foam pads.
- Start by creating your background. Place the watercolour paper on suitable surface protection and spritz with water, this will prevent the paper curling when inked. Turn the paper over and spritz with the Misting Inks, mixing the colours but predominantly using the Scarlet Flame. Smear the ink across the whole surface with a palette knife before finishing with a final spritz of Marigold which will push the mixed inks away. Allow to dry naturally for as long as possible before finishing off with a heat tool – this allows the feathering to develop fully.
- Next print the dried background with the Henna Mosaic stamp inked with Sepia Archival Ink. Repeat to make a pattern. Stamp once onto a sheet of scrap card and cut out the centre to make a mask. Continue to develop the pattern, using a stamp positioner to help line up the mask and stamp through it. Be careful that the ink doesn’t soak through the card mask and spoil the background. Dry off the ink with a heat tool.
- Repeat the stamping process with Perfect Medium, offsetting the image slightly to create a shadow effect. Cover with Bright Gold Metallic embossing powder, tap off the excess and heat set. Repeat until the pattern is complete.
- My first version of the framed piece didn’t look right at all – too busy, not interesting enough visually, and obscured most of the work I’d just done. I used the same stamp on the mount, lining up the images with the background and then distressing the edges:

- So version 2 developed – I stamped the Floral Corner in, well, each of the corners, and using a brand new scalpel blade cut round the flowers (I found cutting tangents was easier than cutting a curve). I used a mount cutter to cut down the width of the mount between the motifs. I used an offcut of the background to print and emboss another round, cut around the petal elements and folded them back. Finally I stamped and embossed the inner petals and curled them up and the centre circle. All of these were stuck down with foam pads.


This is absolutely beautiful, Neil. So rich! I adore Indian textiles, and you’ve really captured the feel. I really like the Henna stamps and must look out for those – love what you did with the lantern, too. Great work!
Shoshi
Gorgeous Neil, the colours are so rich and opulent. Wonderful use of the stamps. Tracy x x
Hi Neil. This is beautiful, so rich and elegant. You have stamped the “shadow” perfectly, it looks so real. Take care.