Tattered Flowers in a Paper Vase

IMG_1165_w


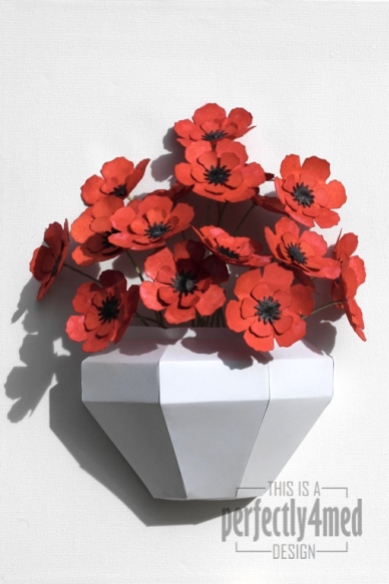
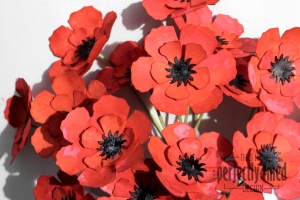
I’ve taken a bit of time out from designing for my college course to make this canvas featuring a paper craft vase and paper craft, die cut, hand coloured and constructed flowers. I’ll be entering it into Tim Holtz’s Tattered Floral Challenge as it is his Tattered Floral die that I used to cut the flowers from 160gsm thin card. The vase is made from the same card to my own design – SVG file available if anyone would like it…

Each flower layer was wrinkle free distressed in first a layer of Fired Brick and Festive Berries both sides, dried and then wrinkle free distressed in a layer of Fired Brick with Ripe Persimmon. They were then dried before being spritzed and flicked with water and left to dry naturally. The centres were punched and then sprayed with Dylusions Granite spray. The flowers were assembled onto florists wire and stuck together with matt multi medium and left to dry over night before being glued into the vase and onto the canvas background.

IMG_1167_w

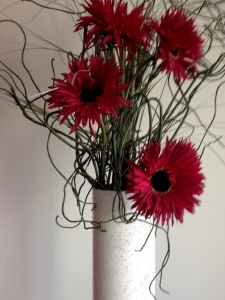
Here’s the inspiration pic, a vase of flowers in our lounge:

IMG_3472

They’re not tangle patterns… but they’re close!

Me again – I’ve survived a three day stint demonstrating and teaching at the NEC Hobbycraft exhibition, and it’s back to college and catch up time! Last week we were set loose to develop our own style in our drawing lessons, and I’ve returned to making repeating patterns from elements of my bead collection. Each of these patterns are A4 in size, in my sketchbook, and have been painted with black acrylic ink. They are all based on the same shapes which I have cut out from a preceding pattern, rearranged and then traced onto the page before block colouring. They’re not tangle patterns… but you could still use them in your zentangles…


Continue reading

Christmas Stained Glass

I’ve just posted my latest WOW! Embossing Powder project over at the design team blog. I learnt quite a lot about embossing powder onto glass! Follow the link to also learn how I managed to take a photo of a mirror without being in it…

When you can’t get leather… try grungepaper!

Hi – this morning has been spent on a commission. I have been asked to wear something I have made using WOW! Embossing Powder when I’m demonstrating at the NEC next week [Hobbycrafts Exhibition, stand M12-15]. Though I didn’t immediately dismiss necklace or earrings, I didn’t think I’d enjoy the ear lobe crushing of a clip on, and necklaces just dangle in the melt pot… So I came up with two ‘man bracelets’:

Both bracelets are made from grungepaper coloured with Vintage Photo and Walnut Stain distress inks, embossed using Tim Holtz texture fades embossing folders, stuck down with Studio matte multi medium. Sewing reinforces the whole thing and the fastening is a Tim Holtz copper hitch. Bracelet 1 features the new WOW! Special Edition Embossing Glitters (Caribbean Jewels) due to be launched at the NEC. Bracelet 2 (The Other Wrist) features the WOW! metallic embossing powders. Grungeboard would work as well, but I didn’t have a size that wrapped round my wrist!

[Not quite] Exclusive Stamp News!

I’m finally allowed to reveal one of the brand new line up of WOW! Embossing Powder stamps making their debut at the Hobbycrafts Exhibition at the NEC, Birmingham from 8th November 2012.

It’s called ‘NB Canvas’ – and it’s my design 🙂

This versatile frayed fabric stamp will be great for inked backgrounds, but obviously works far far better with a layer of embossing powder to give really tactile texture and a fabric feel to your projects. It’s roughly A6 size, so will work well on cards and scrapbooking as well as altered art projects and why not – even fabrics!

It’s not available in stores yet – as I said, it will debut at the NEC show – but snap one up as soon as you see it!

I’ve created a project with it over at the WOW! Embossing Powder Design Team blog, so please pop over and have a look!

College Term 4 – Jewellery – Week 6 – Part 2

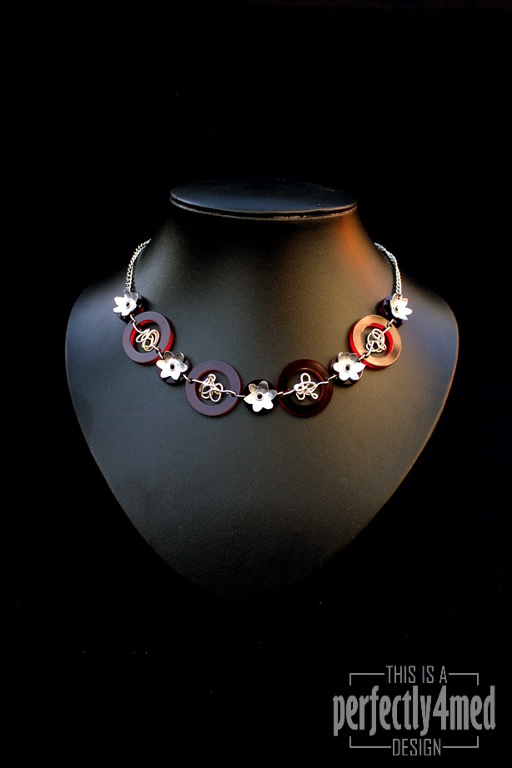
In a previous post you saw my aluminium and perspex necklace, bracelet and earring set. I also designed a second (bonus) piece using the offcuts from the perspex rings, and finished it today:

I’ve added silver wire tangles to the perspex rings. Each of the flowers were hand sawn from sheet aluminium and hammered into shape before being riveted onto the centre offcuts from the laser cut perspex rings. I’m planning to do two more flowers in the session tomorrow to complete a pair of matching earrings.

And I think I’m getting better at product photography! Rather pleased with the serendipitous lighting on this one – early morning in the conservatory with a bit of level tweaking in Photoshop. No artificial lights were used in the production of this image.

Pumpkin Monster Card

I still don’t ‘do’ Hallowe’en, but when you’re on a design team, you have to do what you’re told! I’ve created this card for Wow! Embossing Powders for their Hallowe’en theme this month, and used several different mixes to get the shading. Find out more here. And the template for the pumpkin sections can be found on my templates page.

Twelve Tags of 2012 – September

I’ve been playing with various options of putting colour onto metal – here are the results! I’ll be showing how to do them at the Manic Stamper Craft Club on Saturday.

The tags are first covered with metal foil tape (really thin foil – serves me right for going to the local poundstore!) and then I used a small embossing ball tool to emboss the outlines. Rub over the whole tag with black acrylic paint, and then wait for it to almost dry before rubbing off the paint from the tag – it should catch in the outlines. Add colour with acrylic inks (I used a paintbrush), Promarkers or alcohol inks (I used the Adirondack alcohol ink pen filled with blending solution to pick up dried alcohol inks from a palette). I love the aged look to the metal caused by the black acrylic, and the translucent colour from the Promarkers/alcohol inks. The acrylic inks are more luminous due to their opacity. By the way, alcohol seems to denature acrylic, so if your black coating doesn’t work out, wipe over with alcohol hand gel and try again!

And as a bonus, I’m publishing the forget-me-not doodle as a tangle pattern 🙂

Creevagh – tangle pattern

I’m back from a holiday in Ireland, and while there I put pencil to paper and designed four new tangle patterns from scratch. They’re all named after places we visited during the stay. I’m also a bit out of touch with what patterns are out there (including my own!) – so if any are the same, or similar, apologies, and let me know!

I’ve enjoyed playing with the negative spaces on these, and this one can be embellished by emphasising the circles.

Next week: ‘Monaghan’.